
Changing Water Filter Under Sink — Complete step-by-step guide, tips & maintenance plan
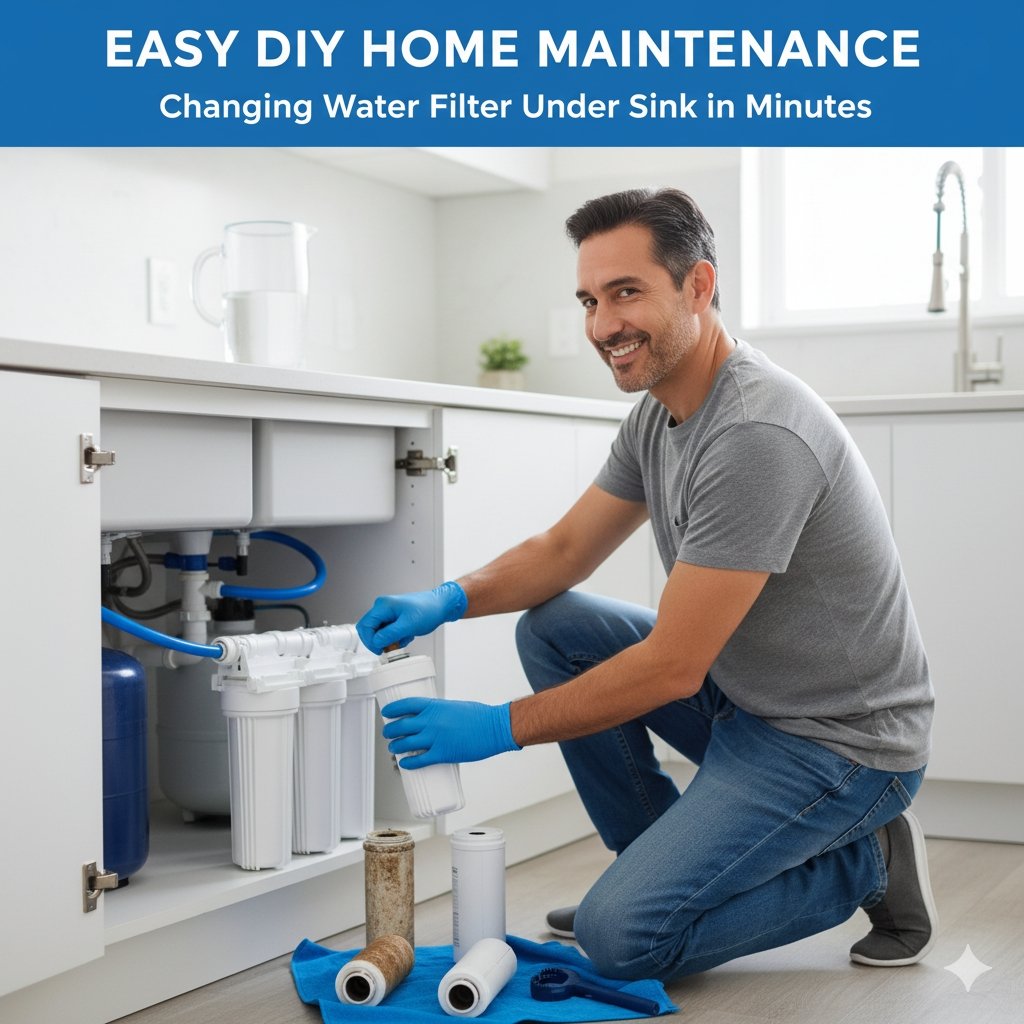
If you searched changing water filter under sink, you want a clean, reliable how-to that gets the job done right without surprises. This long-form guide walks you through everything: how to identify your under-sink system, when and why to change filters, the tools and parts you need, detailed step-by-step replacement instructions for the main system types (inline cartridges, screw-off housings, and under-sink RO systems), troubleshooting, safe disposal, cost expectations, and a practical maintenance schedule you can follow forever. I’ll also point you to sources for replacement parts and accessories so you can order what you need quickly: check product specs at https://yourwatergood.com/ and buy cartridges & accessories at https://yourwatergood.com/shop/.
Read straight through or jump to the section you need — by the end you’ll know exactly how to change water filter under sink and keep your system performing like new.
Why changing the under-sink filter matters
Under-sink filters do important work: they trap sediment, remove chlorine and other tastes and odors, and — in multi-stage units — protect sensitive components like RO membranes. When filters are overdue for replacement:
- Flow decreases and pressure drop rises.
- Adsorptive media (carbon) becomes exhausted and can no longer remove contaminants.
- RO membranes suffer shortened life if prefilters are neglected.
- A stalled or clogged filter can lead to unexpected leaks or bacterial growth in stagnant water.
Routine replacement restores flow and water quality, protects downstream equipment, and prevents service calls. It’s inexpensive preventive maintenance with a very high return.
How to tell the right time to replace
You don’t always need a lab to know a filter is tired. Use these indicators:
- Scheduled time has passed. Manufacturers typically state months or gallons — follow that as your baseline (e.g., sediment every 3–6 months, carbon 6–12 months, RO membrane 2–5 years).
- Reduced flow at the dedicated faucet or drop at other fixtures after the filter — a classical sign of clogging.
- Return of chlorine taste or odor — carbon is exhausted.
- Sputtering or air in lines after refill — sometimes normal after service; persistent sputtering signals problems.
- Higher TDS on an RO system measured with a TDS meter (product TDS close to feed TDS means the membrane is failing).
- Visible discoloration or heavy staining in the housing or cartridge on inspection.
Mark replacement dates on cartridges and set calendar reminders so the system never drifts into neglect.
What types of under-sink systems you may have
Different systems require slightly different procedures. Identify your system before starting.
- Inline quick-connect cartridges — small cylindrical modules that snap into 1/4″ or 3/8″ tubing using push-fit connectors. Common for fridge lines and compact point-of-use filters.
- Standard screw-off housings (10″ / 20″ cartridges) — separate plastic housings that unscrew; cartridges sit inside. Common for sediment, carbon, and whole-point-of-use setups.
- Proprietary twist/twist-lock cartridges — branded quick-change systems (twist to remove).
- Under-sink reverse osmosis (RO) systems — multi-stage assemblies with prefilters, an RO membrane, a storage tank, and a post-filter. These require ordered cartridge changes (prefilters first).
- Multi-cartridge head systems — modular heads with cartridge blocks that click into place; follow manufacturer order.
Before you begin, identify which of the above you have — the instructions below cover each type.
Tools & supplies checklist (be ready)
Most changes are straightforward and require a compact kit:
- Replacement cartridge(s) — match model number or exact dimensions.
- Housing wrench (plastic) — usually supplied with the system; inexpensive replacements are widely available.
- Adjustable wrench or pliers (for fittings).
- Bucket and towels to catch spills.
- Food-grade silicone grease (for O-rings).
- Spare O-rings (good to keep on hand).
- Flathead screwdriver (for clamps/saddles).
- Pen and label or waterproof marker to mark install date.
- TDS meter (optional but useful for RO performance checks).
- Gloves and safety glasses (optional).
Have everything within reach before starting — it speeds the job and reduces mistakes.
Safety first — shutoffs and pressure relief
Always prioritize safety:
- Turn off the cold water supply to the filter. Most under-sink installations have a dedicated shut-off valve on the cold inlet. If not, shut off the home’s main.
- Open the filtered faucet to relieve pressure and drain standing water. For RO systems, close tank valve first if instructed and open faucet to empty the tank.
- Unplug any electrical devices (UV lamps, booster pumps) before working on the system.
- Place a towel and bucket under the housings to catch drips.
- Work slowly and keep fittings clean — don’t cross-thread or force components.
These small steps prevent water damage and keep the replacement clean and safe.
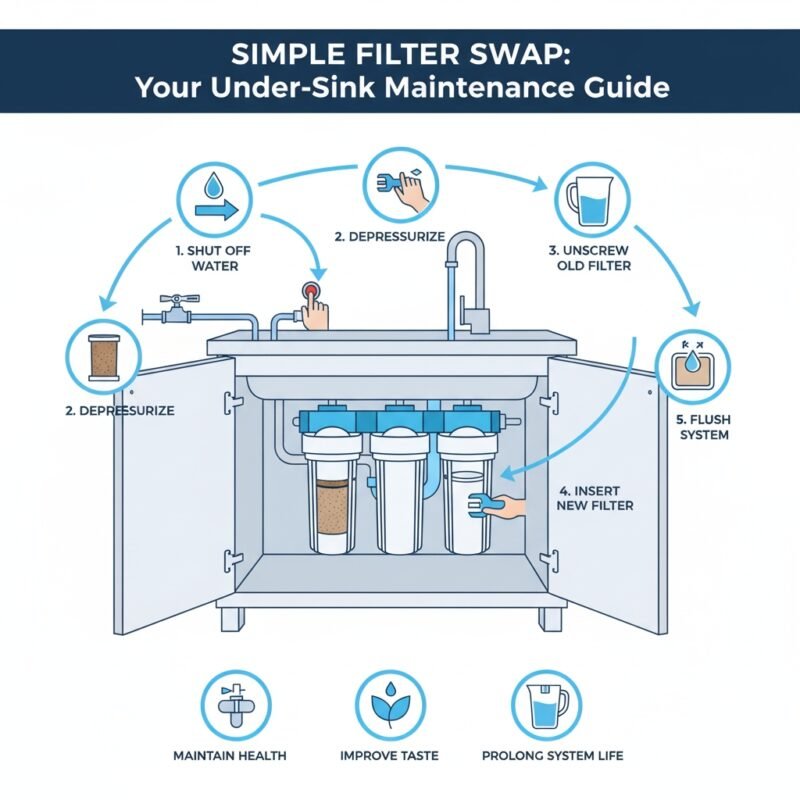
Step-by-step: changing a standard screw-off under-sink cartridge
This is the most common homeowner task (10″ / 20″ housings).
- Shut off water & depressurize. Turn the supply valve off and open the filtered faucet until flow stops. Place bucket/towels.
- Loosen the housing. Fit the housing wrench on the plastic housing and turn counterclockwise. If it’s stuck, hold the filter head (use a rag to prevent damage) and give a firm but measured pull. Avoid metal tools that can crack plastic.
- Remove the old cartridge. Tip the housing to drain into the bucket and lift the spent cartridge out. Inspect for heavy sediment or unusual debris.
- Inspect and lubricate O-ring. Remove the O-ring and inspect the groove. Wipe clean and apply a thin layer of food-grade silicone grease to the O-ring. Replace the O-ring if nicked or flattened. Seat it fully in the groove.
- Install the new cartridge. Place the cartridge in the housing in the correct orientation (some cartridges are directional). Seat it fully.
- Reassemble & hand-tighten. Screw the housing onto the head by hand until snug. Finish with the wrench for 1/4 turn but don’t over-tighten — overtightening damages threads or O-rings.
- Slowly re-pressurize. Open the supply valve slowly while watching for leaks. Keep towels ready.
- Flush per manufacturer instructions. New carbon cartridges need flushing: run the faucet for the recommended volume (often 1–3 liters for simple cartridges; RO systems require more).
- Label the date. Mark the housing or cartridge with the install date and next due date.
That’s it — most standard changes take 10–20 minutes.
Step-by-step: replacing inline quick-connect cartridges
Inline cartridges are compact and fast to swap.
- Turn off the water & relieve pressure. Shut the water and open the faucet until flow stops.
- Release tubing. For push-fit connectors: depress the collet (the plastic ring) firmly and pull the tubing straight out. Some systems require pressing a release button.
- Remove old cartridge and mount new cartridge bracket if applicable.
- Trim tubing if needed. Cut square with a tubing cutter to ensure a clean seat on the push-fit.
- Insert tubing fully into new cartridge until it seats (you’ll feel a stop). Pull gently to confirm secure connection.
- Turn on water slowly and check for leaks. Flush the cartridge per instructions.
- Label install date.
Push-fit systems make repeat maintenance fast and reliable — ideal for renters or quick swaps.
Step-by-step: servicing an under-sink RO system (order matters)
RO service is the most involved: prefilters first → membrane → postfilter. Follow the sequence.
- Turn off feed water and tank valve. Close feed valve; close tank valve and open RO faucet to empty the tank. Unplug pumps or UV devices.
- Drain the storage tank. Open faucet until flow diminishes, indicating tank drained. This reduces pressure in the system and makes cartridge removal easier.
- Replace prefilters (sediment, carbon). Unscrew housings or remove twist cartridges and replace sediment and carbon prefilters. This protects the membrane.
- Replace membrane (if due). Remove membrane housing cap (usually a large threaded cap on the membrane housing), pull out the old membrane (pliers help), and insert new membrane fully seated. Re-cap securely.
- Replace postfilter & remineralizer last. The polishing filter should be last so new prefilters don’t introduce fines into the post stage.
- Sanitize if scheduled. Annual sanitization of the tank and system is a good practice: follow the manufacturer’s instructions (often involves adding a low-level sanitizing solution and flushing thoroughly).
- Restore water & let system fill. Open feed, tank, and faucet in the correct order and check for leaks.
- Flush system thoroughly. Many manufacturers recommend flushing several tank volumes to purge preservatives and carbon fines — do this before drinking.
- Test TDS if you have a meter: check feed vs product TDS to ensure membrane performance. Typical RO reduction is 85–95%+ depending on the membrane and feed.
- Record the date.
RO maintenance often takes 45–90 minutes for a full service. Keep replacement prefilters on hand so you can service quickly when needed.
O-rings and seals — small parts, big impact
O-rings are cheap but critical. When opening housings:
- Inspect O-rings for cuts or flattening — replace if any damage.
- Clean the O-ring groove to remove grit.
- Apply a thin smear of food-grade silicone grease to the O-ring for a reliable seal (don’t use petroleum greases).
- Make sure the O-ring sits correctly before tightening housings — a pinched O-ring causes leaks.
Keeping a small spare O-ring kit under the sink saves time when an old ring fails.
Flushing and priming — don’t skip this
New filters (especially carbon) often contain trapped dust or “carbon fines.” Failing to flush leads to poor initial taste and cloudy water.
- Simple carbon/sediment cartridges: flush until water clears or for manufacturer-recommended minutes/volume (commonly 1–3 minutes).
- RO systems: flush multiple tankfuls (manufacturers often recommend 2–3 tank cycles).
- Inline cartridges: typically flush a small volume (check the instructions).
Flush slowly and taste/test before labeling the system “ready.”
Troubleshooting common problems after replacement
Leak at housing seam
- Likely cause: misseated O-ring or dirt in the groove. Fix: depressurize, reseat or replace O-ring, lubricate, and re-assemble.
Low flow after replacement
- Cause: incorrect cartridge orientation, clogged prefilter upstream, kinking in tubing, or partial shutoff. Fix: confirm orientation, inspect lines, replace clogged upstream filters.
Bad taste after filter change
- Cause: insufficient flushing of carbon. Fix: flush longer. If taste persists, check you installed the correct cartridge type.
High TDS on RO product
- Cause: membrane failure or missed prefilter change. Fix: test feed vs product TDS, replace membrane if needed.
Sputtering faucet
- Cause: trapped air in the lines. Fix: open faucet until steady flow returns.
If problems persist, check model manuals and contact technical support with model/part numbers and install date.
Responsible disposal & environmental notes
Filters are mostly plastic with spent media. Best practices:
- Check manufacturer take-back programs — many vendors offer recycling or mail-back for spent cartridges.
- Separate recyclable parts (metal clamps) where possible and follow local recycling rules.
- Minimize waste by choosing longer-life cartridges (pleated options last longer) or subscription bundles to avoid rushed, single-use purchases.
- Reuse flush water (from initial cartridge flush) for nonpotable uses like plant watering if safe for your plants and local guidelines allow.
Be mindful: RO reject water is not suitable for drinking but can be used for toilet flushing or irrigation if safe and permitted.
Replacement parts: how to buy the right cartridge
- Match model numbers exactly. If you can’t find the exact OEM part, match dimensions, end-cap style, and micron rating.
- Prefer OEM or reputable aftermarket — lower-quality parts may shed fibers or underperform.
- Check certifications for health claims (NSF/ANSI 42/53 for carbon/lead reduction).
- Buy multi-packs to save shipping and ensure you always have a spare.
- Verify quick-ship availability: for RO systems, membranes and prefilters should be easy to reorder.
Shop sources like https://yourwatergood.com/ to verify compatibility and https://yourwatergood.com/shop/ for cartridges and accessories.
Cost expectations & budgeting
Typical price ranges (rough guidelines):
- Single carbon/sediment cartridge: $10–$30 each.
- Inline cartridge: $10–$60 depending on specialty media.
- RO prefilters (set): $20–$80 per set.
- RO membrane: $40–$200 depending on brand and capacity.
- Housing wrench / O-ring kit: $5–$20.
Annual maintenance cost for a typical under-sink unit (non-RO): $20–$80. For RO including membrane amortized: $50–$250/year. Costs vary by usage and water quality.
Maintenance schedule you can trust (printable)
- Every 3 months: check flow & visual housing condition; replace sediment filter in high turbidity areas.
- Every 6–12 months: replace carbon prefilter/postfilter (or as per part rating).
- Every 12 months: inspect O-rings, sanitize housings if needed.
- Every 2–5 years: replace RO membrane (depending on TDS & usage).
- Ongoing: test product water periodically and record replacement dates.
Stick to the calendar: place reminders on your phone or use an auto-ship plan from your supplier.
Quick pro tips and installer tricks
- Keep a replacement kit under the sink: one spare prefilter, spare O-rings, silicone grease, and a cartridge wrench.
- Always change prefilters before the RO membrane to protect the membrane.
- For stubborn housings, filling a towel with hot water and wrapping it around the housing gently warms the plastic and makes removal easier.
- Label tubing with arrows or colored clips to avoid cross-connections when servicing.
- If you own multiple properties, standardize on a single cartridge family to simplify stocking and reduce mistakes.
Small habits like these reduce service calls and increase system longevity.
FAQ — short answers
Q: Can I change under-sink filters myself?
A: Yes — most under-sink and inline systems are DIY-friendly. RO systems are also doable if you follow the sequence and flush properly.
Q: What happens if I forget to replace the filter?
A: You’ll experience reduced performance and potential degradation of downstream components; long neglect can require more costly repairs.
Q: Is sanitizer necessary when changing filters?
A: Annual sanitizing is a good practice, especially if bacterial contamination was suspected or the system sits unused.
Q: How do I verify an RO membrane is good?
A: Measure feed vs product TDS. If the product TDS is close to feed TDS, the membrane likely needs replacement.
Final checklist — change water filter under sink in 10 steps
- Identify system type and order correct replacement parts.
- Gather tools and lay down towels/bucket.
- Shut off supply and relieve pressure.
- Unscrew housing or release quick-connect.
- Remove old cartridge and inspect housing.
- Clean and lubricate O-ring; replace if damaged.
- Install new cartridge (observe orientation).
- Hand-tighten housing; slowly open water and check for leaks.
- Flush per instructions and verify water clarity and taste.
- Mark install date and set next replacement reminder.
Changing water filter under sink is one of the most valuable routine tasks you can do for water quality and system longevity. With the right parts, a small toolkit, and a consistent schedule, replacement is quick, safe, and effective. When you’re ready to order cartridges or check compatibility, visit https://yourwatergood.com/ for product details and https://yourwatergood.com/shop/ to buy replacement filters and accessories — stock the parts you need and never miss a scheduled change again.