
How To Change Under Sink Water Filter — A Complete Hands-On Guide
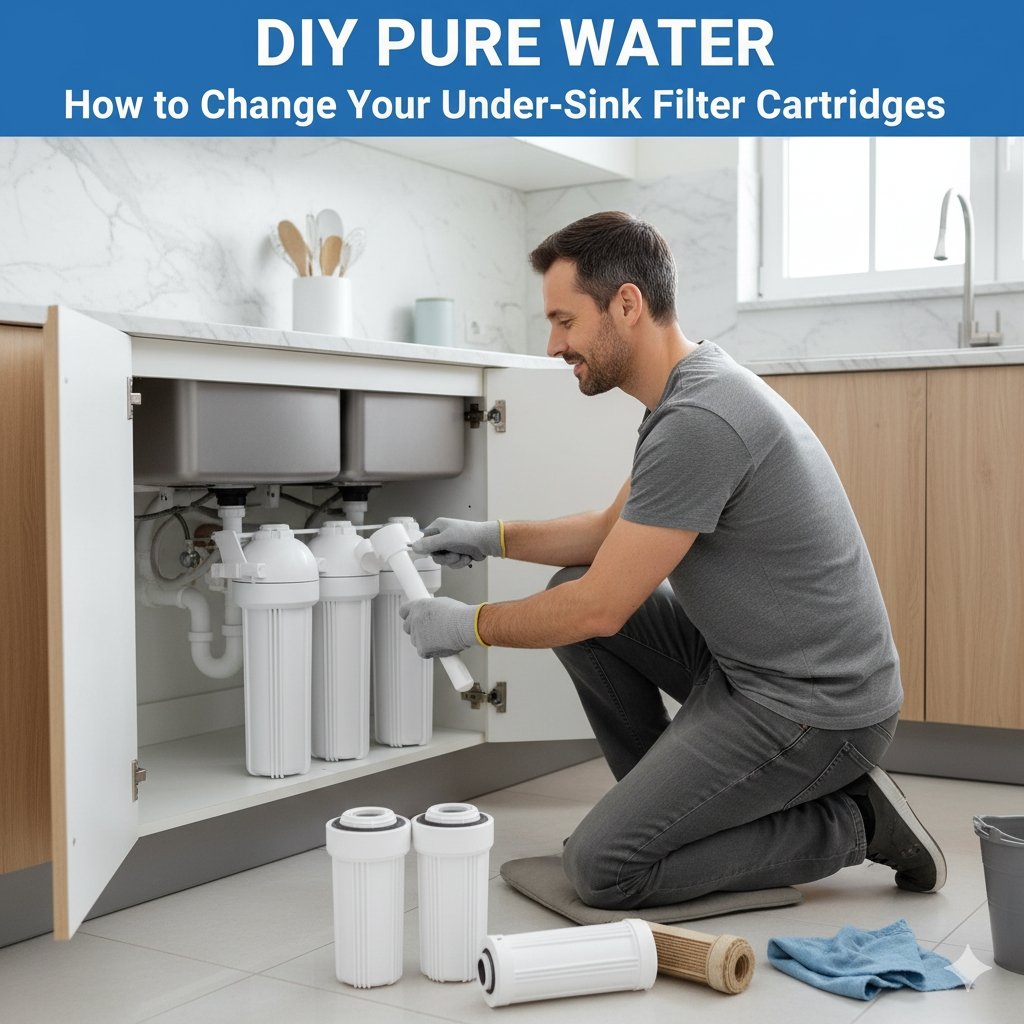
If you’ve typed how to change under sink water filter into a search bar, you’re in the right place. Replacing an under-sink water filter is one of the highest-value, lowest-effort maintenance tasks you can do for better-tasting water and longer appliance life. This guide walks you through everything — why and when to change the filter, what tools and parts you need, step-by-step replacement for the most common systems, troubleshooting tips, safe disposal, and a maintenance plan that keeps your system running smoothly for years. You’ll also find shopping pointers and links to replacement parts so you can buy with confidence: check model specs at https://yourwatergood.com/ and order replacement cartridges and accessories at https://yourwatergood.com/shop/.
Why replacing the under-sink filter matters (don’t skip this)
Under-sink filters are designed to do important jobs: remove sediment, chlorine, taste and odor compounds, and sometimes specific contaminants like lead or VOCs. Over time:
- Filter media clogs with trapped particles, reducing water flow and increasing pressure drop.
- Activated carbon loses capacity, so it no longer adsorbs chlorine, organics, or tastes/odors effectively.
- Bacteria can colonize old, stagnant cartridges if replacement intervals are ignored.
- Membranes and housings can be damaged if prefilters are left too long and heavy loads reach sensitive stages.
Skipping replacements leads to poorer water quality, slower flow, higher stress on fixtures, and the risk of bypass or contaminant breakthrough. Routine replacement — when done right — restores flow, taste, and system performance.
How often should you change the under-sink water filter?
Replacement intervals vary by system and water quality. Use these general guidelines:
- Sediment prefilter (PP): every 3–6 months if your water has visible particles; up to 12 months for clean municipal water.
- Carbon prefilter/post-filter (taste & odor): every 6–12 months.
- RO membrane (if part of under-sink RO): every 2–5 years (depends on feed TDS and prefilter maintenance).
- Inline or specialty cartridges (PFAS, fluoride, remineralizer): follow manufacturer guidance, typically 6–12 months.
- High-turbidity or well water: replace more frequently — sometimes monthly for sediment cartridges until a stable baseline is achieved.
Always follow the manufacturer’s recommended intervals as your baseline, but use flow and taste as practical indicators (reduced flow or return of chlorine taste means replace early). Mark install dates on cartridges to avoid guesswork.
Safety first — what to shut off and why
Before any work, protect your home and yourself:
- Turn off the cold-water supply under the sink. Many installations have a dedicated shutoff valve; if not, use the home’s main water shutoff.
- Turn off the faucet and open it to relieve pressure and drain remaining water.
- If your system has electricity (UV, pump), unplug it. Never work on electrical components with power applied.
- Place a towel and a bucket under the housings to catch drips.
- Wear gloves if cartridge media could irritate skin or if you’re handling older, potentially contaminated cartridges.
- Have a clean cloth and sanitizer ready (a mild bleach solution or alcohol wipes) to clean fittings and the housing area.
These simple steps prevent leaks and make the job smoother.
Tools & supplies you’ll need (basic kit)
Most under-sink filter change jobs require a small set of household tools:
- Soft towel or small plastic bin (to catch drips)
- Cartridge wrench (usually provided with housing or inexpensive replacement)
- Adjustable wrench or pliers for fittings (if the system uses threaded fittings)
- Flat-head screwdriver for quick-connect clips or clamps
- Replacement cartridge(s) — match model number and micron rating exactly
- Food-grade silicone grease (for O-rings) — optional but recommended
- Replacement O-rings (good to have spares)
- Clean water jug for flushing and initial purge
- TDS meter (optional) to check post-change performance
- Pen and label to mark installation date
Having these items ready saves time and reduces the chance of trouble mid-replacement.
Types of under-sink systems — which process applies to your unit?
Under-sink filters generally fall into a few common categories; the replacement technique varies slightly by type:
- Single-cartridge housings (simple inline carbon or sediment). Usually a single screw-off housing.
- Multi-stage housings (stacked cartridges in separate housings or a modular block). Each stage has its own cartridge and maintenance interval.
- Push-fit/quick-connect inline cartridges (small canisters connected with 1/4″ tubing). These often have push fittings for fast replacement.
- Under-sink Reverse Osmosis (RO) systems — multi-stage with storage tank, RO membrane, and specific sequence of pre/post filters.
- Proprietary cartridge systems (branded quick-change cartridges that click into a housing or head). These may have a twist-lock or bayonet fitting.
Before starting, identify your unit type — it will determine the exact sequence of steps and tools.
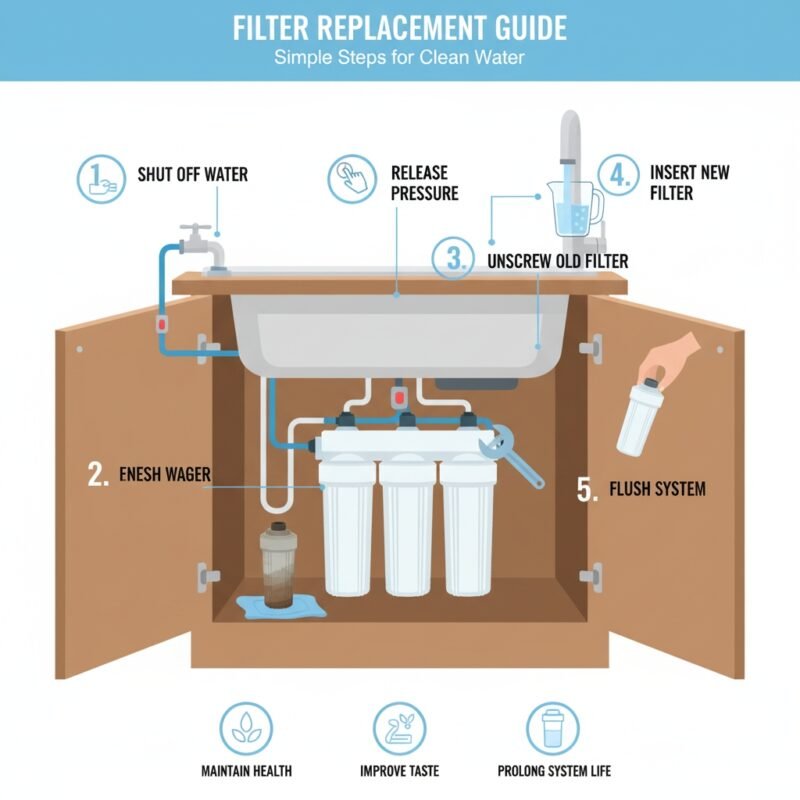
Step-by-step: changing a basic screw-off under-sink filter cartridge
(For single-cartridge or standard 10″/20″ housings)
- Shut off water and relieve pressure: Turn off the under-sink feed valve and open the filtered faucet to release pressure. Place a towel and bucket under the housing.
- Position the wrench and loosen housing: Use the plastic or metal housing wrench to turn the housing counterclockwise. If it’s stuck, hold the filter head with adjustable pliers (protected by a rag) to avoid damage.
- Remove the old cartridge: Once unscrewed, tilt the housing to drain into the bucket, then pull out the spent cartridge and set aside for proper disposal. Inspect the interior for sediment and gunk.
- Check and clean the O-ring groove: Remove the O-ring and inspect for nicks. Wipe the groove and O-ring with a damp cloth; apply a thin coat of food-grade silicone grease to the O-ring to ensure a good seal. Replace the O-ring if cracked or worn.
- Insert new cartridge: Place the new cartridge into the housing, oriented per manufacturer instructions (some have top/bottom). Make sure it seats fully.
- Reinstall housing: Screw the housing back into the head by hand until snug; use the wrench for a final 1/4 turn — don’t overtighten, which can damage threads or the O-ring.
- Turn on water slowly and check for leaks: Open the feed valve gradually to repressurize; check for leaks at the housing seam. Open the faucet and flush per manufacturer directions (usually several liters) to purge dust and carbon fines.
- Record the date: Label the housing or cartridge with the install date to track replacements.
Simple, fast, and effective — most homeowners can do this in under 20 minutes.
Step-by-step: changing multi-stage under-sink systems (non-RO)
Multi-stage systems usually have two or three separate housings (sediment → carbon → polish). Change prefilters first to avoid contaminant transfer.
- Shutoff & depressurize as above.
- Change the sediment cartridge first (the first housing on the feed line). This reduces the particulate loading a new carbon filter will see.
- Proceed to carbon/polishing stages, following the same housing removal, O-ring check, cartridge insertion, and snug reassembly.
- Purge in sequence: After replacing all cartridges, open the feed valve slowly, and open the dispenser faucet to flush each stage thoroughly. If possible, flush until water runs clear or per the gallons recommended (commonly 2–5 gallons).
- Check flow and taste: Once flushed, compare flow rate to pre-replacement and taste the water for residual carbon fines.
Replacing stages in the correct order and flushing well prevents carbon dust and ensures immediate water quality.
Step-by-step: changing an RO under-sink system (full sequence)
RO systems are slightly more complex because they include membranes, tanks, and additional fittings. Follow this sequence:
- Shut off water to the RO system and open the RO faucet to relieve pressure. Close the tank valve if present.
- Turn off the feed valve (saddle valve or dedicated shutoff) and unplug any electrical components (UV lamp, booster pump).
- Drain the storage tank by opening the RO faucet until the tank is empty (or until flow drops significantly). This makes access easier.
- Change prefilters first — sediment then carbon. Replace these per the manufacturer’s instructions. Always replace prefilters before the RO membrane when scheduled maintenance calls for both — a new membrane should follow new prefilters if both are being replaced around the same time.
- Replace the RO membrane (if due): remove the membrane housing cap, extract the old membrane (use pliers if tight), and insert the new membrane with the correct orientation until it seats fully. Re-secure the housing cap.
- Replace post-filter (polishing filter) and any remineralizer stage last. This prevents contamination of the membrane with fines created while changing other elements.
- Sanitize the system (optional but recommended annually): follow the system manual for sanitizing the tank and housings using a manufacturer-recommended sanitizer. Typically it involves adding a small measured amount of unscented household bleach or a specific sanitizing solution to the storage tank or housings and flushing per instructions. Rinse thoroughly after sanitizing.
- Turn on feed water and fill tank: Open the feed valve and allow the system to refill. Monitor for leaks.
- Flush the new membrane and system: After the tank fills, drain and refill at least once to purge trapped preservatives and fines. Many manufacturers recommend flushing several tankfuls before drinking.
- Check TDS (recommended): Use a TDS meter to compare feed and product water to verify membrane performance. Typical RO systems provide >90% TDS reduction depending on membrane and feed conditions.
- Record all dates and parts used.
RO changes can take longer — plan about 45–90 minutes for a full service (pre-filters, membrane, post-filter).
Replacing push-fit / quick-connect inline cartridges (fast change)
Many modern under-sink and refrigerator inline cartridges use push-fit connectors that make replacement tool-free.
- Shut off the water and relieve pressure.
- Release the quick-connect: Hold the collet (the plastic ring) firmly against the fitting and pull out the tubing while keeping pressure on the collet. Some models require pressing a release ring or button.
- Remove the spent cartridge from the mounting bracket (some snap into place).
- Install the new cartridge, pushing tubing firmly into the push-fit connector until it seats fully (you’ll feel a stop).
- Secure the cartridge in the bracket and turn water back on.
- Flush as instructed.
Quick-connect systems are excellent for renters and those who want minimal tools and time.
O-rings and seals — small parts that matter
O-rings are cheap but critical. When you open housings:
- Inspect the O-ring for cracks, nicks, or flattening. Replace if any defect is visible.
- Lubricate lightly with food-grade silicone grease to ensure a long seal life and prevent the ring from rolling out of its groove.
- Clean the groove so the O-ring sits properly — a trapped grit particle can cause leaks.
- Keep spare O-rings in your kit; housings age and rings occasionally fail at reassembly.
Never use petroleum-based grease; it degrades rubber and contaminates the filter.
Flushing and priming — don’t skip this step
New carbon and sediment cartridges often contain “carbon fines” or trapped dust. Flushing is necessary:
- Open the RO faucet or dispenser after the change and run water until it runs clear or until the manufacturer’s recommended gallons have passed (often 1–3 minutes for simple carbon filters; several tankfuls for RO membranes).
- If you taste carbon or notice a slight odor, continue flushing — these are normal and transient.
- For inline cartridges, flush per instructions (typically a few minutes).
- Document the flush so you know the cartridge has been primed and is performing as expected.
Proper flushing ensures the water you drink is clean and free of temporary artifacts.
Troubleshooting common issues after replacement
Persistent leak at housing seam
- Cause: O-ring not seated or damaged.
- Fix: Tighten housing, depressurize, reseat or replace O-ring, lubricate and try again.
Low flow after change
- Cause: Incorrect cartridge orientation, blocked inlet, clogged prefilter, or housing cross-threaded.
- Fix: Check orientation, inspect for kinks in tubing, ensure housings are fully open and not overtightened.
Bad taste after installing new filter
- Cause: Insufficient flushing of new carbon filter.
- Fix: Flush according to instructions and test again after several liters or tankfuls.
High TDS in RO product
- Cause: Old or failing membrane, or missing prefilter change.
- Fix: Test feed vs product TDS; replace membrane if product TDS approaches feed TDS.
Air sputtering from faucet
- Cause: Air trapped in lines during replacement.
- Fix: Open faucet and let it run until sputtering stops; may take a minute.
If problems persist, consult the manufacturer manual or contact technical support with model numbers and replacement dates.
Disposal and environmental considerations
Used filter cartridges and membranes are consumer waste. Best practices:
- Check with the manufacturer — some offer recycling or take-back programs for spent cartridges.
- Empty and dry the cartridge as much as possible before disposal (if allowed by local regulations).
- Remove metal/plastic parts that may be recyclable and separate them per local recycling rules.
- Avoid draining concentrated backwash (from cleaning) to storm drains—use household drains that go to sewer where permitted.
- Consider longer-life pleated cartridges if you want fewer disposals over time.
Responsible disposal reduces environmental impact and aligns with many vendors’ sustainability programs (check options at https://yourwatergood.com/shop/).
How to choose the right replacement filters (buying tips)
To match performance and avoid headaches:
- Match the model number exactly – the simplest and most reliable approach.
- Confirm micron rating and media type (e.g., 5 µm spun PP or carbon block).
- Prefer OEM or high-quality aftermarket filters — they often have better tolerances and certification backing.
- Check certification claims — if health claims (lead, cyst removal) matter, verify independent test results or NSF/ANSI certifications.
- Buy multi-packs if you plan to maintain a schedule — it saves shipping and ensures you have replacements on hand.
- Stock spares for O-rings and quick fittings — they’re inexpensive and valuable when a ring fails.
- Look for a clear replacement schedule and customer support from the seller.
Use reputable suppliers: browse certified replacement cartridges and accessories at https://yourwatergood.com/ and stock up at https://yourwatergood.com/shop/ to ensure part compatibility and availability.
Maintenance schedule template (print and post under the sink)
- Day 0: Install new filter(s). Log date on cartridge label.
- 3 months: Check flow & visual housing condition. Replace sediment if needed.
- 6 months: Replace carbon prefilter and post-filter. Check O-rings.
- 12 months: Full inspection; replace pre/post-filters; sanitize system if required.
- 2–5 years: Replace RO membrane (if applicable). Mark next membrane replacement date.
Keep a paper or digital log with dates, part numbers, and any notes (e.g., increased turbidity after heavy rains). A simple calendar reminder prevents forgetting.
Pro tips from installers (little details that make the job easier)
- Keep a small kit under the sink with spare O-rings, a cartridge wrench, and a few replacement cartridges.
- Install a TDS meter near the RO faucet — a quick measurement tells you membrane health.
- Replace prefilters before the membrane — this protects the membrane and extends life.
- Use thread tape on older threaded fittings to prevent slow leaks.
- If housings are stuck, apply heat briefly (warm water) to the housing to expand the plastic slightly before using a wrench. Don’t use excessive force.
- When buying replacements, buy one extra cartridge for emergencies.
These small moves save service calls and extend component life.
FAQ — quick answers
Q: Can I use any 10” filter in my housing?
A: Not always — match micron rating, end-cap style, and length (10” vs 20”) exactly.
Q: My filter smells after replacement — is that normal?
A: Minor carbon odor after initial flush is normal; flush longer. If it persists, contact seller.
Q: How long should an RO membrane last?
A: Typically 2–5 years; check product TDS periodically.
Q: Do I need to sanitize when changing filters?
A: Annual sanitization is recommended, more often if bacterial contamination was suspected.
Final checklist — end-to-end quick reference
- Turn off feed water and depressurize.
- Gather tools and new cartridges.
- Protect the cabinet floor with a towel and place a bucket.
- Unscrew housings or release quick-connects carefully.
- Inspect and lubricate O-rings; replace if worn.
- Install new cartridge(s) in correct orientation.
- Reassemble, turn on water slowly, and check for leaks.
- Flush/purge per manufacturer instructions.
- Test flow and taste; use TDS meter for RO.
- Record replacement date and schedule next change.
Replacing your under-sink water filter is straightforward, inexpensive relative to the benefits, and well within the comfort zone of most homeowners. By following the sequences above, keeping a small spare-parts kit, and purchasing genuine or high-quality replacement cartridges (find compatible parts and shop options at https://yourwatergood.com/ and https://yourwatergood.com/shop/), you’ll enjoy fresh, clean, great-tasting water and longer service life from your system.