
Main Line Water Filter for Home: The Complete Guide to Whole-Home Protection
Every homeowner wants clean, reliable water—at every faucet, in every appliance, and for every task. A main-line (point-of-entry) water filter treats all incoming water where it enters the house, protecting plumbing, improving water quality for bathing and laundry, and reducing the load on point-of-use systems. This guide explains what main-line water filters are, why and when to install one, the technologies available, realistic costs, installation and maintenance steps, how to choose the right system for your home, and practical checklists for procurement and long-term care.
If you’re shopping or comparing quotes, use a whole-house product page to benchmark features and specs during vendor conversations: https://yourwatergood.com/product/whole-house-water-filtration-system-for-home/.
What is a main-line water filter?
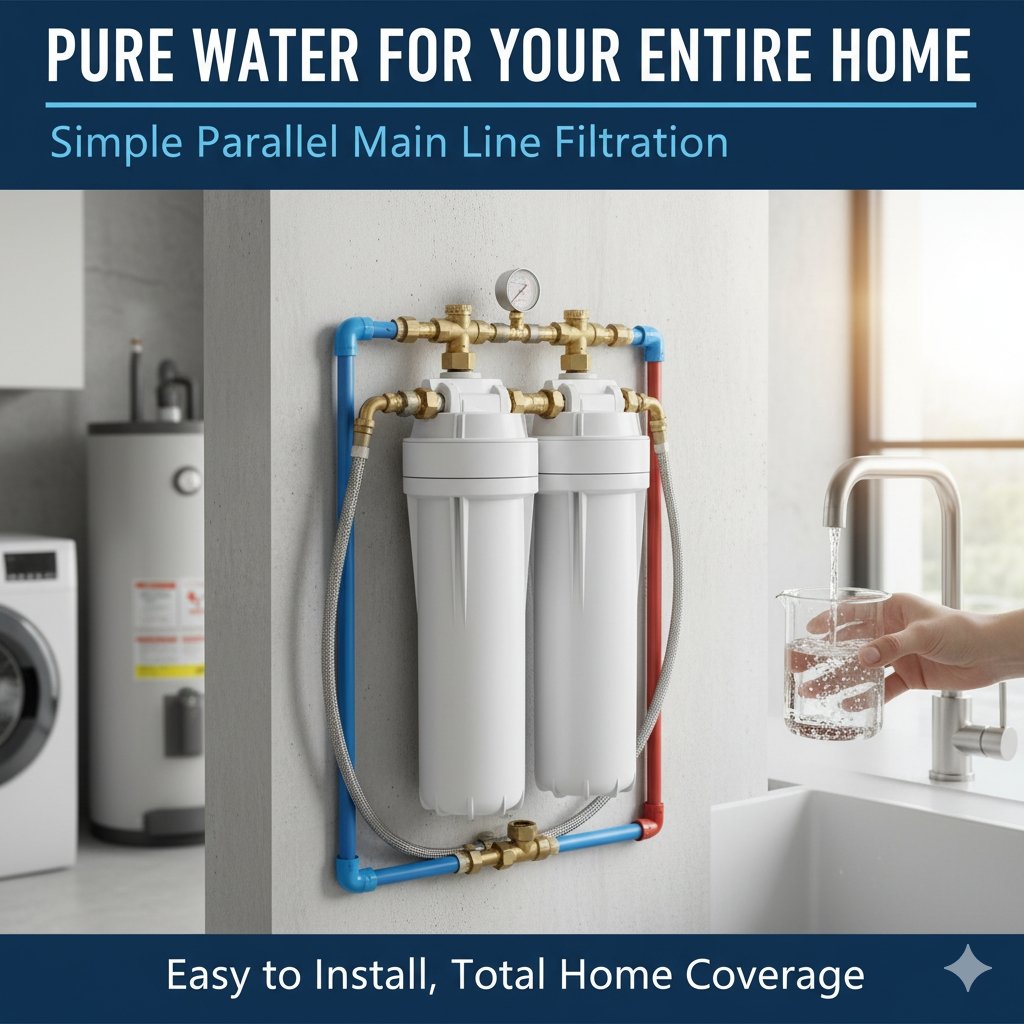
A main-line water filter—also called a point-of-entry (POE) or whole-home filter—is installed where municipal or well water enters a house. It treats water for every use: sinks, showers, appliances, toilets and irrigation. Unlike point-of-use filters (under-sink or countertop), a main-line system improves or conditions water before it distributes through the home’s plumbing.
Main-line systems vary from compact cartridge housings that remove sediment and chlorine to multi-stage configurations that combine sediment removal, carbon adsorption, softening, and specialty media (iron removal, catalytic carbon for chloramines, or UV for microbiological control). They may include backwashing tanks, electronic controllers, and bypass valves for ease of maintenance.
Why install a main-line water filter?
A main-line filter protects the whole house. Here are the primary benefits:
- Protects plumbing and appliances: Removes sediment and particulate that cause abrasion and blockages; reduces chlorine and oxidants that can damage rubber seals and corrode components.
- Improves bathing and laundry experience: Reduces chlorine and odor, improves soap performance, and reduces spotting and fabric damage for laundry.
- Extends appliance life: Water heaters, dishwashers, washing machines and coffee/espresso equipment last longer when sediment and damaging chemicals are reduced.
- Reduces maintenance: Fewer clogged aerators, scale buildup, and deposit-related failures mean less frequent service calls.
- Centralized management: Filtration, softening and disinfection are handled at one location, simplifying maintenance scheduling and minimizing duplicate equipment.
- Supports point-of-use systems: Treating feedwater at the main line protects under-sink RO membranes and lengthens cartridge life.
For homeowners with well water, a main-line filter often includes specialized media for iron, manganese, and bacteria control. For municipal water, a carbon-based main-line system commonly removes chlorine taste and odor and protects household systems.
Common contaminants and problems a main-line filter addresses
Main-line systems can be configured to address one or more of the following:
- Sediment (sand, rust, silt): Causes cloudy water, clogs valves and shortens filter life.
- Chlorine / chloramine: Municipal disinfectants cause taste/odor and can degrade plumbing materials. Catalytic carbon is effective for chloramine; GAC or carbon block for chlorine.
- Iron and manganese: Cause staining, metallic taste, and can foul filters and appliances. Solutions include oxidation, greensand, or catalytic media and backwashing systems.
- Hardness (calcium & magnesium): Causes scale on heating elements, reduces efficiency and shortens appliance life; treated with softeners or alternative scale-control media.
- Sediment-borne bacteria or turbidity: Requires pre-filtration and sometimes UV disinfection in the treatment train.
- Volatile organic compounds (VOCs) & pesticides: Carbon adsorption can target many organic contaminants, but certified performance and lab data should be requested.
- Taste & odor issues: Carbon filters are primary tools for aesthetic improvements.
- Lead and heavy metals: Specific certified cartridges and carbon block options can reduce lead; targeted solutions and testing are essential.
Choose treatment stages based on a professional water test — it’s the only way to tailor a main-line system effectively.
Types of main-line systems and technologies
Main-line systems are modular. Here are the common building blocks and their roles:
1. Sediment filters (cartridge or backwashing)
- Role: Remove particles, sand, rust, and turbidity.
- Form factors: Disposable cartridges (5–50 µm), pleated washable cartridges, or automatic backwashing sediment filters for heavy particulate loads.
- When to use: Always use sediment removal as the first stage to protect downstream media and extend service life.
2. Granular Activated Carbon (GAC) and Carbon Block Tanks
- Role: Adsorb chlorine, organics, taste/odor compounds, and many VOCs.
- Form factors: Pressure vessels filled with GAC or carbon block cartridges in housings. Catalytic carbon is used when chloramines must be broken down.
- When to use: Municipal water with chlorine/chloramine or any site with taste/odor complaints.
3. Water Softeners (ion-exchange) and Catalytic Scale Conditioners
- Role: Remove hardness (calcium & magnesium) via salt-based ion-exchange, or control scale without salt using template-assisted crystallization (TAC) or other media.
- When to use: High hardness levels (measure in gpg or ppm).
4. Iron and Manganese Removal Systems
- Role: Oxidation (air, manganese greensand, or chemical oxidants) followed by filtration or catalytic media to remove dissolved iron and manganese.
- When to use: Iron/manganese exceeds nuisance thresholds or causes staining.
5. Ultraviolet (UV) Disinfection
- Role: Inactivates bacteria, viruses and other microorganisms when installed after proper pre-filtration.
- When to use: Well water or if microbiological contamination is a concern.
6. Specialty Media (KDF, ion-exchange resins, PFAS-targeted media)
- Role: KDF and similar media reduce certain metals and inhibit biological growth; ion-exchange resins remove nitrate or specific ions; specialized adsorbents target PFAS and other emerging contaminants.
- When to use: Based on lab results and treatment goals.
7. Commercial / Engineered Skids
- Role: For large homes or small facilities, packaged skids combine pumps, controls, multi-stage media and automation.
- When to use: High flow demand or complex treatment needs.
Combining these technologies in the correct sequence produces a robust main-line solution: sediment → oxidation/iron removal → carbon → softener → UV → point-of-use polishing is a common and practical treatment train.
How to determine if you need a main-line filter
Start by asking these questions:
- What’s your water source? Municipal vs well water determines likely contaminants.
- Have you experienced issues? Staining, cloudy water, bad taste/odor, frequent appliance failures, or low water pressure could indicate problems a main-line system would help.
- Have you tested your water? Professional lab testing is essential. It should measure hardness, iron, manganese, TDS, pH, turbidity, bacteria (if well water), and any suspect contaminants.
- What are your goals? Protect appliances, improve taste, avoid whole-house RO, reduce maintenance, or meet a specific health concern?
- Budget and footprint: Main-line systems range widely in cost and space requirements — ensure you have an appropriate installation location.
If you answer yes to issues that affect multiple outlets, or you want comprehensive protection and simplified maintenance, a main-line filter usually makes sense.
Typical installation locations & space considerations
Main-line systems are typically installed in:
- Unfinished basements near the incoming water shutoff.
- Utility rooms or garages when basement access is unavailable.
- Mechanical rooms in newer homes.
- Exterior enclosures (heated sheds or insulated cabinets) in mild climates — ensure freeze protection.
Space planning considerations:
- Allow space for filter housings, tanks, and access for media replacement.
- Ensure floor strength for large tanks and plan for proper drainage near backwash or regeneration points.
- Position a bypass valve to provide unfiltered water during maintenance if needed (some owners prefer a dedicated bypass for selected appliances).
- Provide an electrical outlet if the system includes pumps, controllers, or UV lamps.
Good installers will survey the location, present a P&ID (piping & instrumentation diagram), and confirm service access before finalizing the quote.
Cost expectations — equipment, installation, and ongoing
Costs vary with complexity, capacity and site work. Here are realistic U.S. ranges to help planning:
Equipment (typical ranges)
- Basic sediment + single carbon cartridge whole-house: $300–$1,000.
- Multi-stage whole-house systems (sediment + carbon + softener or iron removal): $1,200–$6,000 depending on media and tank sizes.
- Backwashing iron or multimedia tanks: $1,500–$6,000.
- Full engineered systems with UV and automation: $4,000–$15,000+ for larger homes or advanced needs.
Installation and site work
- Simple cartridge installs (plumbing only): $200–$800.
- Complex installs (tanks, drains, electrical, pumps): $800–$4,000+ depending on required civil work and local labor rates.
- Permits and backflow prevention devices: $100–$1,000 depending on local codes.
Ongoing maintenance
- Filter cartridges: $30–$200 per cartridge depending on size and frequency.
- Media replacement for tanks: periodic media change or replenishment; costs vary widely ($200–$1,500 per event).
- Salt for softeners: $50–$300/year depending on use.
- UV lamp replacement: approximately $100–$400 annually (lamp & sleeve cleaning).
- Service visits: $100–$300 per visit depending on labor and region.
Always compare total cost of ownership (equipment + installation + 5-year maintenance) rather than upfront price alone.
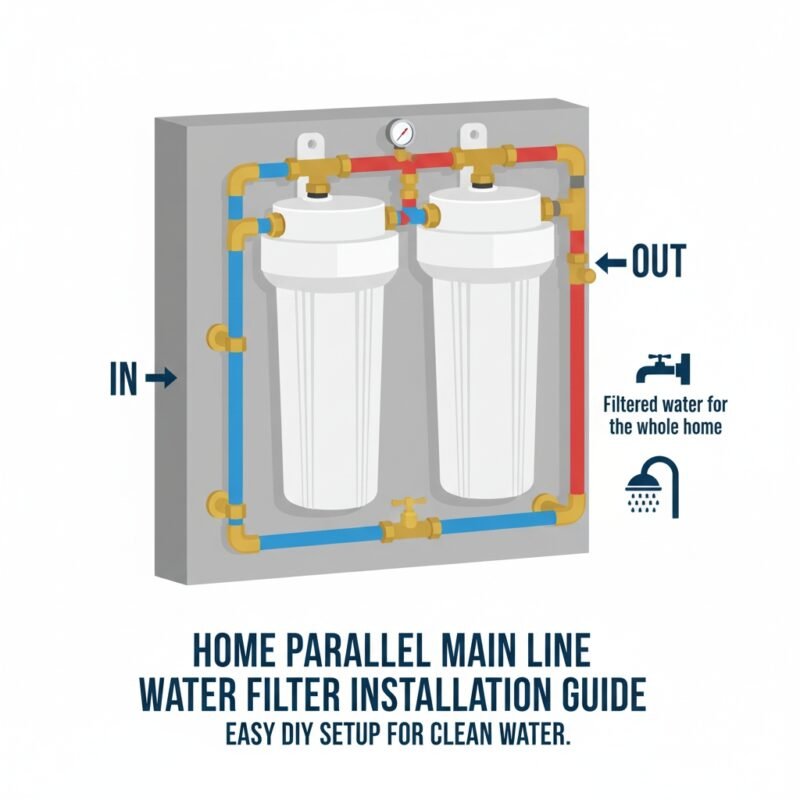
Common installation steps (what a qualified installer will do)
- Site survey & water test: Confirm feed pressure, flow demands, and lab analysis to design an appropriate system.
- System design & P&ID: Lay out the treatment train, valves, instrumentation and bypass.
- Prepare mounting and floor support: Install pads or brackets for tanks and housings.
- Plumb and wire: Install piping, control valves, drain lines for backwash/regeneration, and electrical for pumps/UV.
- Commissioning: Flush and condition media, calibrate sensors, test for leaks and flow, and verify performance (TDS, iron removal, chlorine residual).
- Handover & training: Demonstrate how to operate the bypass, replace cartridges, and interpret indicator lights or alarms.
- Documentation: Provide parts lists, maintenance schedule, and serial numbers for warranty.
Insist on a written commissioning report and acceptance test before final payment.
Maintenance schedule & best practices
Main-line systems are robust but require scheduled care:
- Monthly: Visual inspection for leaks, pressure gauge checks, and brine/salt levels for softeners.
- Every 3–12 months: Replace sediment and carbon cartridges (interval depends on water quality and system sizing).
- Annually: UV lamp replacement and sleeve cleaning (if installed); inspect control valves and clean strainers.
- Every 3–7 years: Media replacement in GAC tanks or iron filters depending on load and capacity. Softener resin may last 10–15 years depending on maintenance and feedwater.
- As needed: Chemical cleaning of membranes (for RO systems) or chemical cleaning of iron fouled media.
Keep a maintenance log with dates, parts changed, and service notes. Consider a service agreement for critical systems to ensure timely maintenance and fast response.
How to choose the right main-line system — a practical checklist
When evaluating systems and vendors, use this checklist:
- Start with a lab water test (not just a home kit). Ensure the vendor uses your actual water test in their design.
- Demand a clear treatment train with the reason for each stage documented.
- Ask for performance guarantees: specific contaminant removal targets, flow rates at X PSI, and recovery ratios or pressure drops.
- Check certifications for components (NSF/ANSI for cartridges, UL/ETL for electrical components).
- Verify maintenance needs and request a 5-year total cost estimate including filter and media replacement.
- Get references and local installs — ask to see example sites or speak to recent customers.
- Confirm spare parts availability and lead times for replacement media.
- Ask about warranties and labor coverage — check what is covered and for how long.
- Inspect the P&ID and acceptance test plan — final payment should be contingent on passing the acceptance testing.
- Consider energy and wastewater impacts (softeners and RO systems use water; RO rejects need planning).
Well-prepared vendors will include all of this in a proposal; if they don’t, ask follow-up questions until you’re comfortable.
Main-line vs point-of-use: when to use both
A common and practical approach is hybrid:
- Main-line filtration for sediment and chlorine to protect plumbing and appliances and improve every tap’s water.
- Point-of-use RO or polishing at kitchen sinks for drinking water, especially if you use a softener (which adds sodium) or if health-related contaminants like nitrate or fluoride need removal.
This hybrid reduces the scope of expensive whole-house RO, reduces RO waste, and simplifies maintenance.
Troubleshooting common problems
- Drop in water pressure after installation: Check for clogged cartridges or undersized filters. Confirm correct cartridge micron rating and vendor sizing.
- Return of taste/odor: Likely saturated carbon — replace carbon stage and verify pre-filtration adequacy.
- Staining or iron reappearance: Check iron removal media life and regeneration settings; ensure proper oxidation stage is functioning.
- Leaks or wet floor: Recheck fittings, O-rings and mounting. Verify drain connections for backwash are secure.
- Alarms or UV lamp failure: Replace lamp and clean sleeve; verify power supply and indicator sensors.
Document issues and service actions; recurrent problems usually indicate a design mismatch with actual water conditions.
Environmental and regulatory considerations
- Brine discharge: Ion-exchange softeners produce salt brine. Some jurisdictions restrict or ban residential salt-based softeners; check local codes.
- Wastewater from RO: RO systems produce reject water. Consider reuse where local codes permit (irrigation, toilet flushing) to reduce wastewater.
- Chemicals and disposal: Dispose of spent media and cartridges according to local regulations; many are safe for municipal solid waste but check for specialized media.
- Energy consumption: Pumps and controllers use electricity. Efficient pumps and variable-frequency drives (VFDs) reduce operational footprint.
Design with sustainability in mind and inquire about low-waste options (high-recovery RO, salt-free scale control, and media longevity).
Frequently asked questions (short answers)
Q: Will a main-line filter make all my water safe to drink?
A: It depends on the system design. Main-line carbon and sediment filters improve aesthetics and protect equipment but may not remove all health-related contaminants. Point-of-use RO or certified cartridges are often used for drinking water purity.
Q: How long does it take to install a main-line system?
A: Simple cartridge installs can be done in a few hours. Complex multi-stage systems with tanks, pumps and electrical work typically require 1–3 days, plus permitting time if needed.
Q: Can I DIY a main-line system?
A: Basic cartridge housings and simple pre-filters can be installed by competent DIYers, but complex systems with pumps, electrical and backwash drains should be installed by licensed professionals to ensure safety and warranty compliance.
Q: How often should I test my water after installation?
A: Test at commissioning and annually thereafter. If you notice changes (taste, color, staining), test immediately.
Closing: plan, design, and protect
A main-line water filter is one of the highest-leverage upgrades you can make to protect home infrastructure, improve daily water quality for bathing and cleaning, and reduce long-term maintenance costs. The foundational steps are simple: test your water, define clear objectives (appliance protection, taste/odor, health contaminants), design the treatment train based on lab results, get multiple detailed proposals, and select a vendor who provides documented performance and a transparent maintenance plan.
For benchmarking and to compare equipment features and maintenance expectations when you’re ready to request quotes, review a representative whole-house product page here: https://yourwatergood.com/product/whole-house-water-filtration-system-for-home/. Use it to verify flow specs, media types and replacement schedules in vendor proposals.
Investing in the right main-line system now saves headaches later—clean water at the entry point makes every faucet and appliance perform better and reduces the chance of unexpected failures. Make decisions based on data, insist on documented performance, and plan for maintenance to get the most from your whole-home filtration system.