
Under sink inline water filter system — Compact Installation, Performance & Maintenance for Clean Kitchen Water
If you searched under sink inline water filter system, you’re probably looking for a space-saving, effective way to improve your drinking water without a full under-sink housing or a bulky countertop unit. This post explains what an under sink inline water filter system is, which problems it solves (and which it does not), how to choose the right cartridge and connection style, step-by-step installation and flushing instructions, realistic cost and replacement timelines, troubleshooting, and long-term maintenance. I’ll also show how to match filter media to contaminants, what certifications to insist on, and where to check replacement cartridges and compatible units. Read through or jump to the section you need — by the end you’ll be able to pick, install, and maintain an under sink inline water filter system that fits your kitchen and your water.https://yourwatergood.com/product/ro-water-purifier/.
What exactly is an under sink inline water filter system?
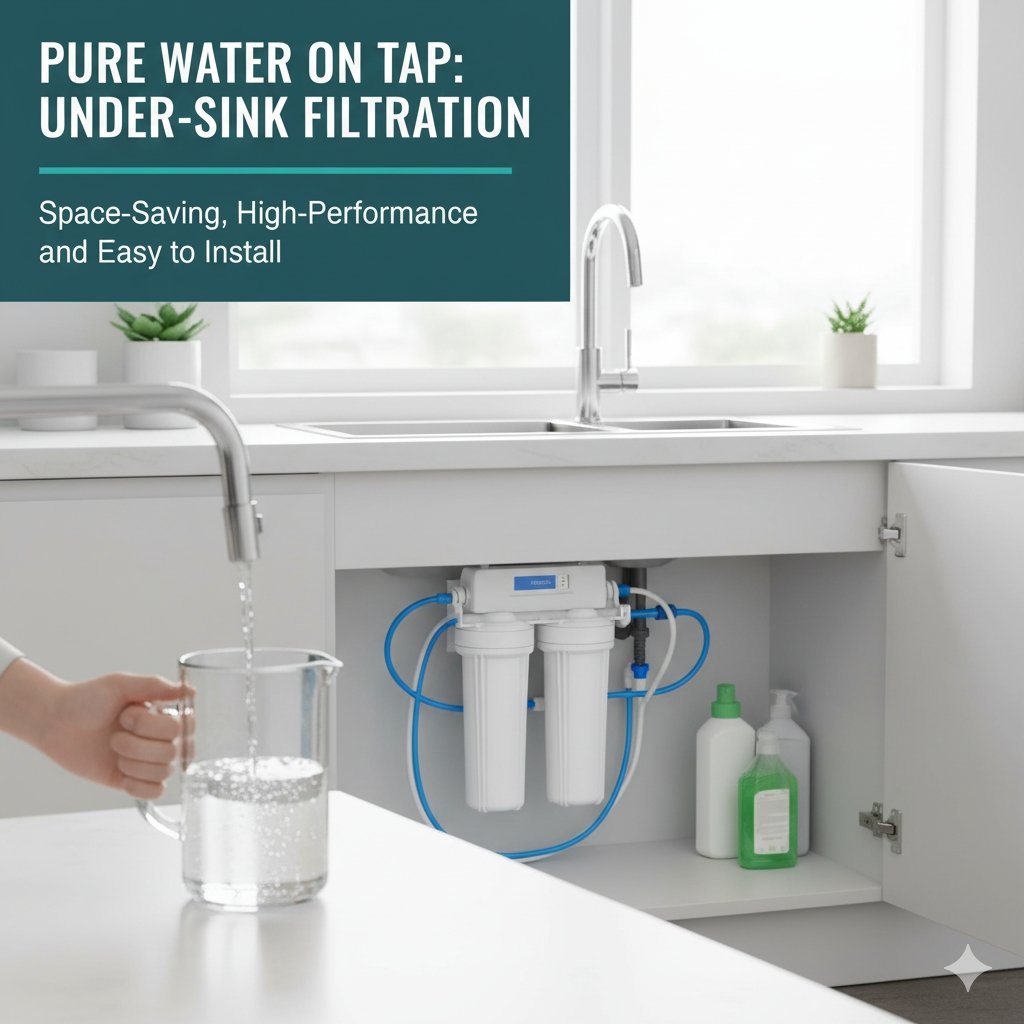
An under sink inline water filter system is a compact filtration module installed directly into a water line—typically the cold water branch that feeds a dedicated filtered faucet, refrigerator, or coffee machine. Inline filters are small cylindrical cartridges or capsule-style housings that connect with push-fit quick connectors, compression fittings, or 1/4″ / 3/8″ tubing. They treat water at a single point of use (POU) rather than the whole house.
Key characteristics:
- Small footprint — fits in narrow cabinet spaces or behind appliances.
- Fast installation — many use tool-free push-fit connectors.
- Low initial cost — both the cartridges and mounts are inexpensive compared with multi-stage under-sink housings or whole-house systems.
- Targeted treatment — ideal for fridge water, ice makers, espresso machines, or a single filtered faucet.
They are popular where space is limited or when the goal is targeted taste/odor improvement and sediment protection rather than full demineralization.
What can an under sink inline water filter system remove?
Inline cartridges vary widely by media. Match the cartridge to the problem you want to solve.
Common inline media and their capabilities
- PP spun or pleated polypropylene (sediment) — removes sand, rust and large particulates (1–50 μm depending on rating).
- Carbon block or granular activated carbon (GAC) — removes free chlorine, improves taste and odor, and reduces many VOCs and disinfection byproducts. Carbon block generally filters particulates better than loose GAC.
- Catalytic carbon — used when chloramine is present (municipal utilities increasingly use chloramine; standard carbon is much less effective).
- Ion exchange or lead-rated specialty cartridges — designed and certified to reduce lead and certain heavy metals. Look for NSF/ANSI 53 certification for lead removal.
- Ultrafiltration (UF) — removes bacteria and cysts but not dissolved salts; used where microbial control is needed and turbidity is low.
- Inline remineralizers — add a small amount of minerals back to RO product water for taste.
What inline filters usually do not do
- Remove high levels of dissolved salts (TDS) — that requires RO.
- Replace whole-house treatment — inline units only treat a single line.
- Guarantee microbial disinfection in dirty, high-turbidity water without additional treatment (UV or RO/UF).
Before buying, test your water (TDS meter, lab test, or municipal CCR) and pick media that address the actual contaminants.
Advantages and trade-offs of inline systems
Advantages
- Minimal space required — ideal under small sinks or inside cabinets.
- Low cost — both initial and per-change costs are typically lower than multi-stage housings.
- Rapid DIY install — push-fit connectors make them friendly for homeowners and renters.
- Targeted use — protect specific appliances (fridge, espresso machine) or provide drinking water without treating all household water.
Trade-offs / limitations
- Shorter media life compared with large housings — less media mass equals faster saturation in high-use or high-contaminant conditions.
- Limited multi-stage capability — while some stacked inline modules exist, they rarely match the capacity of a full under-sink system.
- Flow/pressure constraints — some inline cartridges add pressure drop at high flows; check rated flow.
- Fewer certification options — fewer inline products carry health claims compared to larger certified housings, though certified inline cartridges do exist.
Use inline systems when you need simplicity, convenience, and point-of-use improvement rather than whole-house purification.
How to choose the right under sink inline water filter system
Follow this decision flow to select a cartridge and mount that fits your needs.
- Test or inspect your water
- If your water tastes like chlorine or smells, a carbon inline likely helps.
- If you have visible particles or rusty water, add a sediment inline prior to carbon.
- If you have a known lead risk, choose a certified lead-reduction inline cartridge.
- Use a TDS meter to see if dissolved solids are high (RO may be needed for low TDS).
- Decide treatment point & flow needs
- Treat the refrigerator, coffee machine, or a dedicated filtered faucet? Confirm tubing diameter (1/4″, 3/8″) and required flow (typical fridge ~0.5–1 GPM; kitchen faucet up to 2.5 GPM).
- Choose cartridges rated at or above expected flow to avoid pressure drop.
- Pick the media
- Sediment first (1–10 μm) if any particulate issue.
- Carbon block for chlorine/taste; catalytic if chloramines are present.
- Lead/PFAS specialty cartridges for specific contaminants (check certifications).
- UF for microbial concern if turbidity is low.
- Connection style
- Push-fit quick-connect for tool-free installs.
- Compression or threaded fittings for more permanent installs.
- Choose bracket/mount type that fits your cabinet space.
- Certification and data
- For health claims (lead, PFAS), insist on NSF/ANSI certification and ask for the certificate PDF.
- For taste/odor, certification is less common but lab test data is still valuable.
- Replacement cost and availability
- Check how much replacement cartridges cost and how easy they are to order.
- Consider subscription options for auto-deliveries.
- Brand & support
- Prefer reputable brands with clear part numbers and local support; aftermarket filters may be cheaper but quality varies.
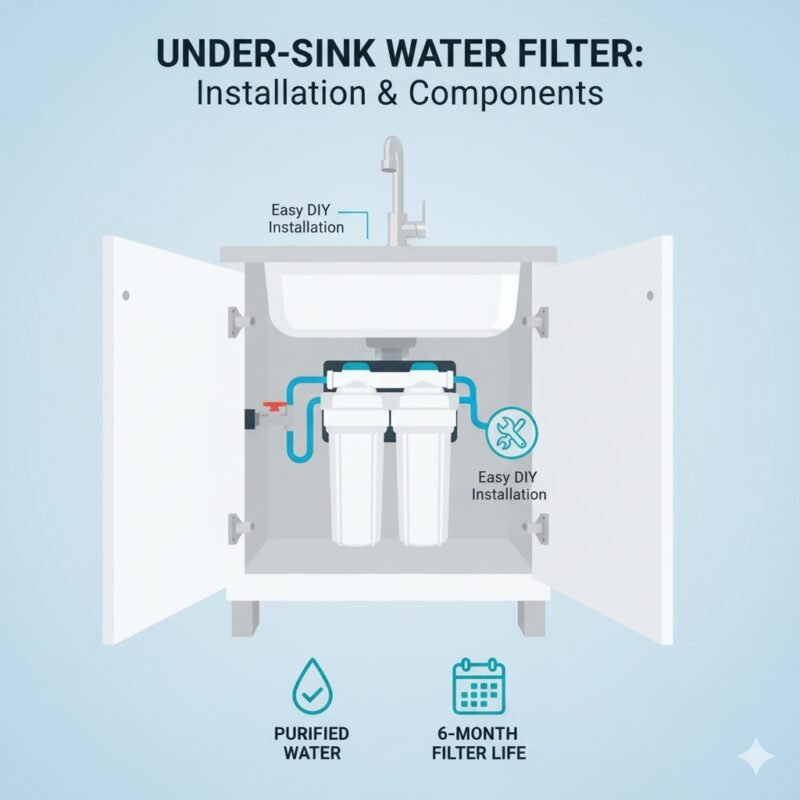
Installation: step-by-step for a typical push-fit inline cartridge
Many inline filters use push-fit fittings and are installed in minutes. Here’s a clear step-by-step.
Tools you might need
- Tubing cutter or sharp utility knife (to make squared tubing cuts).
- Screwdriver or drill (to mount bracket).
- Adjustable wrench (if compression fittings).
- Bucket and towel.
Steps
- Turn off the water supply to the dedicated feed (fridge/faucet) or the cold water shutoff under the sink. Open the associated faucet to relieve pressure.
- Locate a mounting point with clearance for cartridge removal. Mark and attach bracket to cabinet wall.
- Cut tubing square with cutter. Clean burrs or rag to remove debris.
- Insert tubing into push-fit fully until it seats. For compression fittings, add Teflon tape to threads and tighten by hand and then a quarter turn with a wrench.
- Observe direction — most cartridges have an arrow showing flow. Install so feed enters the inlet side.
- Restore water slowly and check for leaks. Tighten fittings if necessary.
- Flush thoroughly — run water through the new cartridge until water clears and manufacturer-recommended volumes have passed. New carbon often needs several liters to purge fines.
- Label install date on the cartridge or bracket.
If you have a refrigerator ice/dispense line, some models require a saddle valve or adapter — try to avoid saddle valves due to long-term reliability issues and prefer a proper T-fit or tee with a dedicated shutoff.
Installation tips and gotchas
- Cut tubing square: angled or crushed cuts prevent a proper seal and create leaks.
- Push-fit locking: after inserting tubing, pull gently to confirm it’s locked. If it pulls out, depress the collet and reinsert fully until it clicks.
- Mount bracket orientation: leave enough clearance to remove cartridge and reach fittings.
- Avoid kinks: route tubing with smooth curves; sharp bends reduce flow.
- Don’t overtighten compression nuts — a snug quarter to half turn after hand tight is usually enough.
- Use food-grade materials and ensure the cartridge is rated for potable water.
- If the feed is hot (rare under sink), ensure cartridge is rated for temperature. Most inline filters are for cold water only.
How to flush and prime your inline filter system
Flushing is essential, especially for carbon media (to remove fines and preservatives).
- New carbon cartridges: flush until water runs clear and taste is neutral — commonly 2–5 liters for small inline cartridges, but check manufacturer instructions.
- Sediment cartridges: flush until water clears.
- After installation: run water through fixture for a few minutes, then check taste and clarity. For systems connected to an ice maker, flush by dispensing and discarding the first several batches of ice or water.
- If there’s an inline check valve, open it slowly to avoid pressure spikes.
Always follow the cartridge maker’s published initial flush volume where provided.
Replacement intervals & realistic lifespan
Replacement intervals depend on water quality and cartridge capacity.
Typical ranges:
- Sediment inline (1–5 μm): 2–6 months in normal municipal water; sooner in high turbidity.
- Carbon inline (taste/odor): 6–12 months for a family faucet; high-use or high-chlorine utilities shorten life. Some high-capacity carbon cartridges last 12 months if flow and usage are moderate.
- Lead/PFAS specialty inline: often 6–12 months depending on capacity and contaminant level — follow the certified gallon rating.
- UF inline: 12–24 months depending on quality and backwashing (if available).
Rule of thumb: mark the install date and check flow/taste monthly. A sudden drop in flow or reappearance of odor indicates replacement is due.
Cost expectations
Inline systems are among the most affordable POUs.
- Inline cartridge mount & bracket: $10–$40.
- Replacement sediment cartridge: $5–$25.
- Replacement carbon inline cartridge: $10–$60 depending on specialty media and certification.
- Certified lead/PFAS inline cartridges: $30–$120 depending on capacity and certification.
- Installation (DIY) is often free; hiring a plumber for a simple inline install might cost $50–$150 depending on local rates.
Total annual maintenance for a typical household inline system often falls between $20 and $120, depending on cartridge types and usage.
Certifications and health claims — what to verify
If you need health-related contaminant reduction (lead, PFAS), don’t rely on marketing. Ask for:
- NSF/ANSI certification that matches the claimed reduction (e.g., NSF/ANSI 53 for lead; NSF/ANSI 401 for emerging contaminants where applicable).
- Certificate PDF and model number — verify the certificate covers the exact cartridge SKU.
- Lab test data — if the cartridge claims PFAS removal, ask for third-party test conditions and species tested. PFAS removal depends on chain length and contact time.
- Material safety — lead-free brass, food-grade plastics, and compliance with local plumbing codes.
If you only need taste/odor improvement, certification is less critical but still nice to have. For health claims, insist on documentation.
Troubleshooting common problems
Leak at push-fit connection
- Cause: tubing not fully inserted or cut not square.
- Fix: depressurize, cut tubing square, reinsert fully, or replace ferrule in compression fittings.
Low flow after install
- Cause: inlet valve partially closed, kink, or cartridge micron rating too fine for the application.
- Fix: check inlet valve and tubing, ensure cartridge rating suits application, or choose a higher-flow cartridge.
Chlorine taste persists
- Cause: insufficient carbon contact time, undersized cartridge, or exhausted carbon.
- Fix: flush more, replace cartridge, or choose a larger carbon block/catalytic carbon if chloramine exists.
Sputtering or air in lines
- Cause: trapped air after installation.
- Fix: open the downstream faucet for 1–2 minutes until steady flow returns.
Off-taste after replacement
- Cause: insufficient flushing, or new cartridge preservative.
- Fix: flush longer and discard initial volumes.
If problems persist, check model compatibility and contact vendor support with photos and cartridge model numbers.
When to choose inline vs. a full under-sink housing or RO
Use inline if:
- You need a simple, compact solution for one tap or appliance.
- Space is limited or you are renting and want minimal plumbing.
- Your water problem is taste/odor or sediment and you don’t need TDS reduction.
Choose an under-sink multi-stage housing or RO if:
- You require very low TDS (drinking water) or removal of dissolved contaminants (PFAS, nitrate).
- You want multi-stage protection and larger media capacity for longer service life.
- You need certified claims for health contaminants at high capacities.
A common, smart setup is POE pretreatment plus POU RO for drinking, or inline carbon for appliances plus under-sink RO at the main kitchen tap.
Buying & stocking tips
- Match fittings and dimensions — verify tubing OD (outside diameter) before buying. 1/4″ vs 3/8″ tubing are common differences.
- Buy OEM or reputable aftermarket — low-cost no-name cartridges may underperform or shed fibers.
- Stock spare cartridges — keep one spare inline cartridge under the sink so you never run past the replacement date.
- Consider subscription plans — many vendors offer auto-ship programs that reduce the chance you run out.
- Keep spare O-rings and small parts if your inline mount uses compression fittings.
When ready to compare certified RO or inline RO-compatible units, check product pages and detailed specs like the one found here: https://yourwatergood.com/product/ro-water-purifier/
Eco and disposal considerations
Inline cartridges create plastic and spent media waste. Reduce impact by:
- Choosing longer-life pleated sediment cartridges where appropriate.
- Recycling plastic parts where facilities allow, and asking manufacturers about take-back programs.
- Using initial flush water for non-potable tasks (plant watering) if safe.
If environmental impact is a priority, consider systems with recyclable components or subscription programs that handle recycling.
Maintenance checklist (printable)
- Install date labeled on cartridge.
- Monthly: visual leak check and taste/flow spot test.
- Every 3 months: replace sediment cartridge (or per condition).
- Every 6–12 months: replace carbon or specialty cartridge (follow manufacturer).
- Annually: inspect fittings, tubing, and mounting bracket. Replace any brittle tubing.
- Keep a spare cartridge on hand.
Stick to the schedule — small habits prevent big problems.
Final thoughts
An under sink inline water filter system is an efficient, cost-effective solution for improving the water quality of a single faucet, refrigerator, or appliance. It’s small, often DIY-friendly, and affordable — provided you choose the right cartridge media for your water problem, install it correctly, and follow a disciplined replacement plan. For households that want targeted improvement without the complexity of a multi-stage under-sink RO, an inline solution is often the perfect fit.
If you’d like help picking the right inline cartridge for your water test or want to compare compatible RO products for under-sink installation, bring your water test results and tubing size and I’ll help translate them into an exact parts list and timeline.