
Best whole house water filter for city water — Practical selection, sizing, and long-term care

If you’re searching for best whole house water filter for city water, you want a reliable system that improves every tap in your home—no more chlorine taste in the shower, fewer sediment surprises, longer appliance life, and predictable maintenance. This article walks through what “best” actually means for municipal supplies, how to test and match technology to problems, sizing and installation considerations, realistic cost and maintenance expectations, and practical configurations that work for most city-supplied homes. I also point you to a representative whole-house model you can use when comparing vendor specs: https://yourwatergood.com/product/whole-house-water-filtration-system-for-home/.
Read this as a decision checklist: by the end you’ll know whether a simple sediment + carbon POE will be enough for your house or whether you should add softening, catalytic carbon, or point-of-use polishing.
Why choose a whole-house system for city water?
City water is generally treated and monitored, but municipal treatment choices and distribution systems create consistent problems homeowners notice:
- free chlorine or chloramine residuals that cause taste and odor;
- rusty particles or pipe sediment that clog aerators and stain laundry;
- varied hardness that causes scale buildup on water heaters, kettles and fixtures;
- occasional spikes of turbidity after main repairs or storms;
- trace contaminants (PFAS, disinfection by-products, metals) in some regions.
A whole-house (point-of-entry, POE) filter treats water before it reaches every tap and appliance. The main benefits are consistent aesthetics (no bad smells/tastes across the home), protection of appliances and plumbing, and centralized maintenance. For many city customers, the best whole house water filter for city water is not the most complex system but the one correctly matched to the specific chemistry in their supply and sized to handle household peak flows.
Start with data: test your water before buying
Don’t buy equipment based on marketing. A short lab panel will tell you what to treat. For city water, a helpful baseline test includes:
- TDS (total dissolved solids)
- Hardness (mg/L CaCO₃ or gpg)
- Free chlorine and total chlorine (and chloramines if present)
- pH and alkalinity
- Iron and manganese (if staining or metallic taste)
- Turbidity (NTU) and suspended solids
- Lead (if home built before 1986 or plumbing suspect)
- (Optional) PFAS screening if local advisories or industrial history exist
Your utility’s Consumer Confidence Report (CCR) is a good start but a direct sample from your inlet and kitchen tap is more actionable for sizing and media selection. Attach your lab results to any vendor RFQ so proposals are tailored, not generic.
What “best” means — selection criteria
When comparing systems or vendors, evaluate these attributes in order of importance:
- Performance evidence — third-party certifications (NSF/ANSI where applicable) or lab challenge reports for the exact model. Look for NSF 42 (aesthetic: chlorine/taste/odor), NSF 53 (health claims like lead), NSF 58 (RO), and specific PFAS testing where relevant.
- Rated service flow & pressure drop — the system must handle your calculated peak GPM with an acceptable ΔP (pressure loss).
- Media capacity & life — how many gallons or months will carbon, specialty media, or softener resin last under your water conditions? Vendors should provide both gallons and calendar life estimates.
- Consumables cost & availability — check SKU pricing and local stocking. A cheap upfront system with expensive, hard-to-source cartridges is a poor long-term value.
- Installation scope & itemized quote — equipment, valves, bypass, gauges, labor, permits; avoid lump sums.
- Warranty & local service — parts warranty length and response time for repairs.
- Monitoring & commissioning — pre/post sampling on installation and pressure gauge/ΔP monitoring capability.
- Physical fit & maintainability — enough clearance for changing 20″ cartridges, accessible bypass, and labeled housings.
A system that checks these boxes for your specific water test is the “best” for your home.
Common whole-house system types and when to use them
Below are practical POE configurations and their strengths for city water.
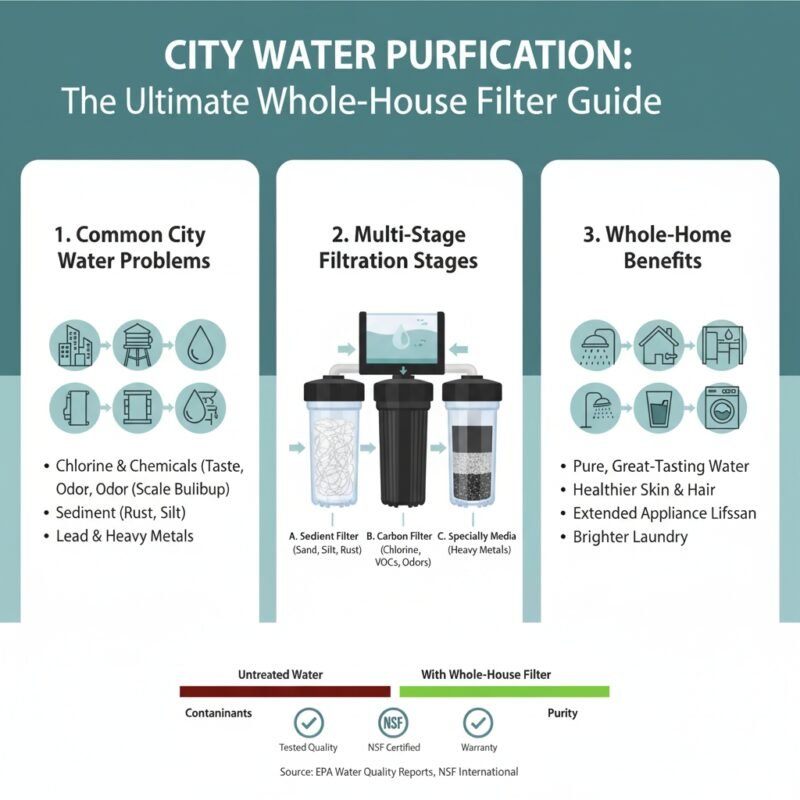
1) Sediment → Carbon (the most common “best” for municipal taste & particulate)
- What it does: coarse sediment first (20–50 µm) to protect media, then a larger carbon bed or 20″ carbon block to remove free chlorine, VOCs and improve taste/odor.
- When to choose: your CCR shows chlorine and your main complaints are taste/odor and occasional particles. This is often the right first step and the lowest TCO for many city homes.
2) Sediment → Catalytic Carbon (for chloramine)
- What it does: catalytic carbon is formulated to remove chloramines where utilities use them instead of free chlorine.
- When to choose: your water utility uses chloramine (confirm via CCR or a call) or if carbon alone fails to remove the residual. Catalytic carbon beds must be sized for contact time.
3) Sediment → Carbon → Softener (for taste + scale control)
- What it does: adds a salt-based softener or efficient salt-saving system to control hardness after removing chlorine and solids.
- When to choose: hardness >7 gpg, scale forming on appliances, frequent lime buildup in kettles or showerheads.
4) POE pretreatment + POU RO (hybrid)
- What it does: treat whole house for sediment and chlorine, then install an under-sink RO for drinking/ice water.
- When to choose: you want appliance protection across the house but very low-TDS water for drinking and ice. This avoids whole-home RO waste and gives high-quality drinking water.
5) Packed media tanks or backwashing multi-media (for variable turbidity)
- What it does: larger packed tanks or automatic backwash media remove turbidity and protect downstream systems without frequent cartridge changes.
- When to choose: distribution mains cause periodic sediment spikes or you have older service lines that shed rust.
6) Specialty media for PFAS/arsenic/lead
- What it does: targeted adsorbents or ion-exchange resins remove specific contaminants. Certification or lab challenge data is essential.
- When to choose: lab test shows PFAS or regulated contaminants above health advisory levels, or you need verified removal.
Sizing: peak flow and media capacity
Two sizing tasks matter: making sure your system can deliver the right flow, and that media life is acceptable.
Step A — Calculate house peak GPM
Estimate simultaneous draws during busiest times (morning routine example):
- Shower = 2–2.5 GPM each
- Washing machine = 2–4 GPM
- Dishwasher = 1.5–2 GPM
- Kitchen faucet = 1.5–2 GPM
A family of four might see 8–12 GPM peak. Add 25–30% margin => design for 10–16 GPM.
Step B — Choose rated components
- For flow under 8 GPM, many 20″ cartridge housings or inline modules work.
- For flows above ~10 GPM, prefer packed carbon vessels or parallel cartridge banks to avoid high ΔP. Vendors must provide ΔP vs GPM curves.
Step C — Convert media capacity to calendar life
If a carbon bed is rated for 200,000 gallons at a given chlorine load, and household treats 400 gpd, expected life ≈ 200,000 ÷ 400 = 500 days (~16 months). Use a safety factor (70–80%) to schedule replacement earlier. For cartridges, 20″ elements offer substantially longer life than 10″ ones.
Installation best practices
- Install at point of entry on the cold main after the meter and before any branch lines you want protected.
- Include a full bypass valve so service can be done without shutting the house water completely.
- Install inlet & outlet pressure gauges with an easily readable ΔP indicator; rising ΔP is the best early sign of a needed change.
- Place a shut-off and union on both sides for simpler future service.
- Locate where service techs can access the housings or tanks comfortably; allow 6–12 inches below cartridges for removal.
- Follow backflow prevention rules and local codes — many municipalities require testable backflow assemblies.
- Commission with pre/post water tests (chlorine, turbidity, hardness if relevant) and get the vendor to provide a commissioning report.
If you’re not comfortable with plumbing and local code, hire a licensed installer — many warranties require professional installation.
Maintenance, monitoring and realistic lifecycles
The “best” system is only as good as the maintenance plan behind it.
- Sediment cartridges (coarse): 6–12 months in municipal systems; fine sediment 1–6 months depending on turbidity.
- Carbon cartridges: 6–12 months for small cartridges; larger packed carbon vessels often last 1–3 years depending on load.
- Catalytic carbon (chloramine): may need more frequent replacement if chloramine residuals are high — vendor should provide life in gallons.
- Softener resin: long life (often 10+ years) but requires monthly salt and periodic servicing.
- UV lamps: replace annually; clean sleeves 6–12 months depending on fouling.
- Monitoring: use ΔP gauges and consider TDS probes (for RO) or chlorine sensors if you want automated alerts.
Set calendar reminders and keep a spare sediment and carbon element on hand — home systems fail most often because consumables were neglected.
Cost expectations and total cost of ownership (TCO)
Upfront and ongoing costs vary by configuration:
- Basic POE Cartridge System (20″ housings with sediment + carbon): equipment $300–$1,000 installed, annual consumables $100–$300.
- Packed carbon vessel with professional media load: $1,200–$3,500 installed; media life often 1–3 years.
- POE + softener: $2,000–$4,500 installed depending on softener size and efficiency.
- POE + POU RO hybrid: $1,800–$4,500 installed depending on RO capacity and existing plumbing.
- Service contracts: $100–$400/year for routine checks and consumable changes depending on local labor.
Compute a 3–5 year TCO that includes equipment, installation, consumables, and optional service. Often a slightly higher upfront cost for larger media reduces 3–5 year TCO by lowering replacement frequency.
How to verify vendor claims and avoid common traps
- Ask for certificate PDFs for the exact SKU before you buy. If a seller claims “removes PFAS” or “removes lead,” demand third-party evidence.
- Get ΔP curves at the rated GPM — don’t accept vague max flow numbers without pressure drop data.
- Request a full itemized quote (equipment, valves, bypass, gauges, labor, permits).
- Check consumables pricing and local availability — price of replacement cartridges often drives user dissatisfaction.
- Insist on commissioning tests (pre/post chlorine, ΔP) before final acceptance; tie payment milestones to passing tests if possible.
Beware of cheap small inline carbon-only units sold as “whole house” solutions — they often restrict flow or provide minimal life and won’t address scale or persistent chloramine.
Practical recommended configurations (real-world scenarios)
Scenario A — Typical city home, chlorine taste, occasional sediment
- Recommended: POE 20″ coarse sediment (10 µm) → 20″ carbon block or packed carbon vessel sized for household flow.
- Why: addresses taste and visible particles, easy maintenance, low TCO.
Scenario B — City supply uses chloramine
- Recommended: sediment → catalytic carbon vessel sized for required contact time; consider POU RO for drinking if additional polishing needed.
- Why: catalytic carbon designed for chloramine; small carbon blocks won’t reliably remove chloramine.
Scenario C — Hard water and chlorine concerns
- Recommended: sediment → carbon → softener (or TAC where brine discharge restricted). Consider POU RO for drinking water if TDS concern exists.
- Why: softener prevents scale, carbon improves taste; TAC is salt-free but performance depends on chemistry.
Scenario D — Concern about PFAS at low levels
- Recommended: sediment → packed carbon bed with PFAS-rated media or POU RO for drinking water; require lab verification post-install.
- Why: PFAS removal performance depends on bed depth and media type — verify with third-party data.
Use the product link below as a baseline to compare flow specs, media volumes and consumable SKU pricing when you collect vendor quotes: https://yourwatergood.com/product/whole-house-water-filtration-system-for-home/.
Frequently asked questions (short answers)
Q: Can I install a whole-house filter myself?
A: If you’re comfortable with plumbing and local code, yes for simple cartridge housings. For larger packed vessels, softeners, or where permits/backflow devices are required, hire a licensed pro.
Q: Will whole-house filtration remove lead?
A: Only if the system includes certified lead-reduction media (NSF/ANSI 53) or you use POU RO at the tap. Test first and require certification.
Q: Does carbon remove chloramine?
A: Standard carbon struggles; catalytic carbon or specific bed sizing is required for chloramine removal.
Q: Should I aim for POE RO to treat the whole house?
A: Generally no — whole-home RO is expensive, wastes significant water, and is unnecessary for bathing and cleaning. For drinking/ice, POU RO is more efficient.
Final decision checklist — pick the best whole house water filter for city water
Before you buy, run this checklist:
- I have a recent water test (or CCR) and documented priorities (taste, scale, PFAS, etc.).
- Vendor provided NSF/ANSI certifications or third-party lab reports for the exact SKUs.
- The proposed system meets my peak GPM with acceptable ΔP curves.
- Consumable SKUs and 3-year pricing are provided and acceptable.
- Installation quote is itemized and includes bypass, gauges and permitting.
- Warranty terms and local service options are acceptable.
- Commissioning with pre/post tests is included in scope.
If all boxes are checked, you’ve found the best whole house water filter for city water for your needs — it’s the system that solves your measured problems, fits your flow and budget, and comes with clear serviceability and evidence.
Closing
Choosing the best whole house water filter for city water is less about a single brand name and more about matching technology to measured needs, sizing for real household flows, and committing to maintenance. A correctly specified sediment + carbon system will improve taste and protect appliances in most municipal settings; catalytic carbon or additional softening or POU polishing are added where tests demand them. Use your water test as the driver, require proof for vendor claims, size the system for peak flow, and plan proactive consumable replacement.
When gathering quotes, use a real product spec as a baseline for flow and media volumes — for comparison, review this practical whole-house model while you request vendor proposals: https://yourwatergood.com/product/whole-house-water-filtration-system-for-home/.