
Ro system in kitchen — Practical Guide to Choosing, Installing and Maintaining the Right RO System in Kitchen
If you’ve typed ro system in kitchen into a search box, you’re probably trying to solve one or more of these problems: tap water tastes or smells off, you want clearer ice and better coffee, you worry about dissolved contaminants, or you want to protect appliances and provide healthy drinking water for your family. This guide covers everything you need to decide confidently: how reverse osmosis (RO) works, what components matter, how to size and place an RO system in kitchen spaces, installation options, maintenance schedules, realistic costs, troubleshooting, and practical tips to get the best water quality with the smallest hassle.
I’ll also point you to a representative product page you can use for comparison while shopping: https://yourwatergood.com/product/ro-water-purifier/. Read through the sections you need or follow the whole article for step-by-step decision help.
Why consider an ro system in kitchen?
An ro system in kitchen is primarily used for producing clean, low-TDS (total dissolved solids) water for drinking, cooking, and ice. Compared with basic carbon-only filters, RO removes dissolved salts, many heavy metals, fluoride, nitrates, and a wide range of organics — giving you noticeably clearer ice, better-tasting beverages, and often peace of mind.
Key reasons homeowners install RO systems in kitchens:
- High-purity drinking water: RO reduces TDS and many dissolved contaminants that carbon alone can’t remove.
- Better ice and beverage quality: restaurants, coffee lovers, and home cooks appreciate the visual and flavor improvements.
- Localized treatment saves water: installing RO at the kitchen sink treats only the water you drink, avoiding whole-house RO’s large water waste and cost.
- Protects health-sensitive family members: useful where well tests, utility notices, or specific health concerns motivate extra removal.
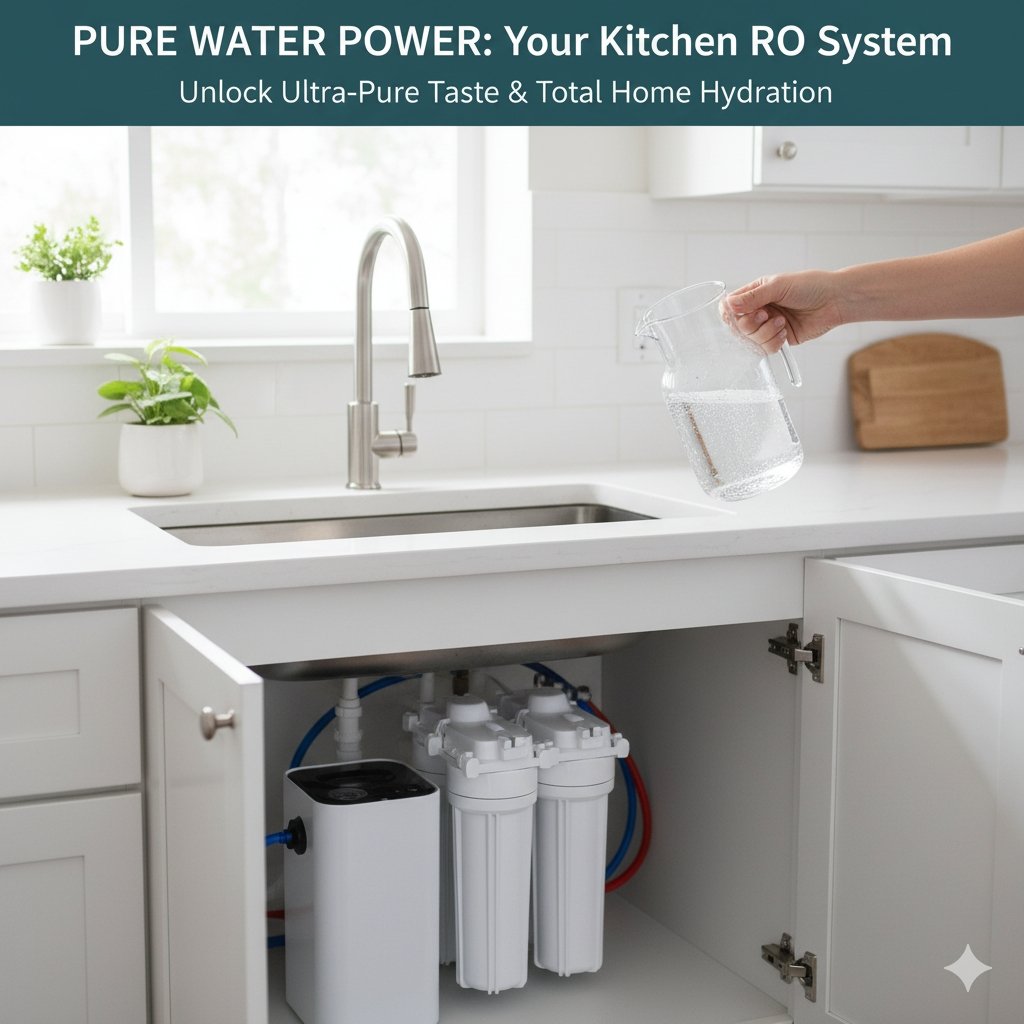
- Convenience and aesthetics: under-sink RO units supply a dedicated faucet — no jugs or countertop take-up.
Before buying, confirm your real need: if your only issue is chlorine taste and municipal water tests are clean on dissolved contaminants, a carbon POU filter may be cheaper and simpler. RO is the right solution when dissolved contaminants or very low TDS are desired.
How reverse osmosis works — a concise, kitchen-friendly explanation
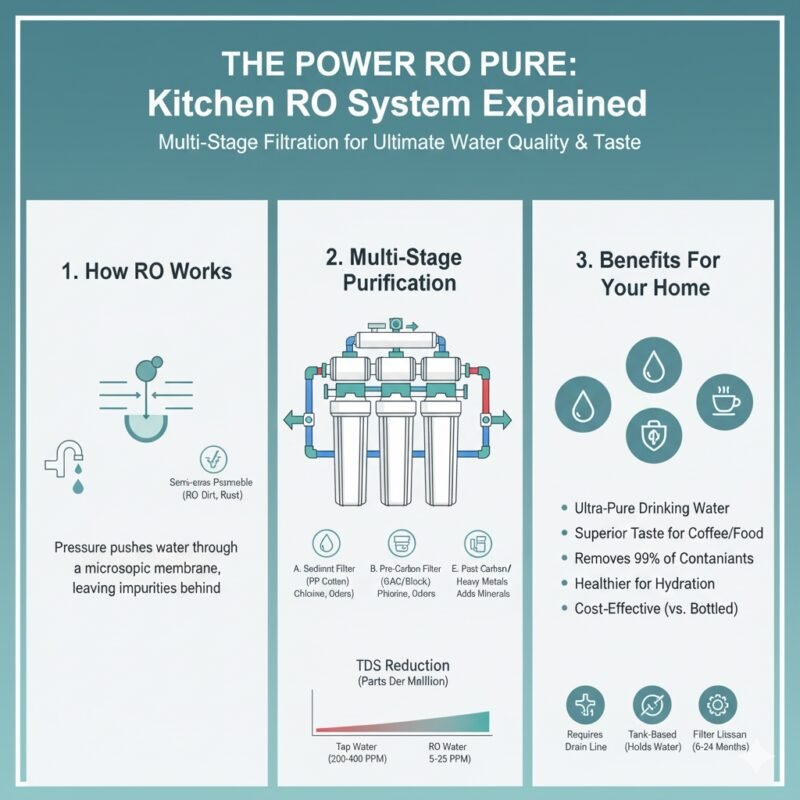
Reverse osmosis is a pressure-driven separation process. Water is forced through a semi-permeable membrane that allows water molecules to pass while rejecting a high percentage of dissolved salts, larger organic molecules, and many contaminants.
A typical kitchen RO train includes:
- Sediment prefilter — removes sand, rust and particulate to protect downstream media and the RO membrane.
- Carbon prefilter(s) — removes chlorine and organics that would damage or foul the RO membrane.
- RO membrane — the heart of the system; rejects dissolved ions and many organics.
- Post-carbon polishing — improves taste and removes any membrane-born odors and residuals.
- Storage tank — holds permeate (treated water) so you have on-demand supply at a dedicated faucet.
- Optional remineralizer — adds back healthy minerals and improves taste if desired.
- Faucet & drain lines — dedicated spout for RO water plus a drain connection for reject (waste) water.
Performance is commonly expressed as rejection rate (percent reduction of TDS or a specific contaminant) and recovery (the percentage of feedwater converted to permeate). Under-sink RO systems typically have recovery in the 20–50% range, meaning 50–80% of the feedwater goes to drain as reject. Newer high-recovery designs push recovery higher but often at higher cost and complexity.
Is installing an ro system in kitchen the right approach for me?
Ask the following before you choose:
- What does my water test show? If you have high TDS, nitrates, fluoride, lead, or specific contaminants (PFAS, arsenic in some regions), RO is an effective choice for a kitchen POU. If the main issue is chlorine taste only, a carbon filter may be sufficient.
- Do I need low-TDS for beverages/ice? Specialty coffee, some culinary uses, and clear ice benefit from RO.
- What is my tolerance for maintenance and waste? RO requires periodic membrane and cartridge changes and produces reject water. If you prefer low maintenance and zero reject, consider well-sized carbon or other tech.
- Do I want remineralized water? Some users dislike the “flat” taste of straight RO water and prefer a remineralizer to add back calcium and magnesium.
- How much water do I use? If your household drinks large volumes from RO (many liters per day), consider a higher-capacity RO or a point-of-entry solution for specific appliances.
A kitchen RO balances quality and convenience: it gives highly treated water where you need it with manageable cost and maintenance compared to whole-house RO.
Selecting the right type of ro system in kitchen
Under-sink RO systems come in several variants. Choose based on space, flow, recovery, and desired water quality.
Common options:
- Basic 3–4 stage under-sink RO: sediment → carbon → RO membrane → post-carbon. Affordable and compact; suitable for most households.
- 5–6 stage with remineralizer: same as above with an additional alkaline/remineralization stage to boost pH and taste. Good when users dislike flat RO water.
- High-recovery RO: designed to reduce waste (higher recovery). Usually more expensive and may require booster pumps if feed pressure is low. Good where water conservation is critical.
- Tankless (instant) RO: no storage tank; provides on-demand filtered water via high-output membrane and pump. Saves space and avoids tank maintenance but needs higher power and may be noisier.
- Countertop or small under-sink RO: compact for apartments or rental where you can’t plumb under-sink. Lower capacity but portable.
Key selection criteria:
- Membrane rejection rate: look for 90–99% TDS rejection depending on desired purity.
- Feedwater TDS and hardness limits: RO membranes have operating limits — very hard or high-TDS water may require extra pretreatment or a two-pass RO.
- Recovery ratio and reject rate: factor environmental and cost impacts.
- Flow rates & tank size: faster flow or bigger family needs larger tank or tankless high-flow design.
- Certifications: NSF/ANSI 58 for RO systems is the standard for systems that make health-related claims. Insist on certified performance for specific contaminants if relevant.
- Ease of cartridge access: check how easy it is to change prefilters and membrane — front access and quick-change housings reduce service time.
Sizing an ro system in kitchen for your household
Sizing matters to avoid low flow and long wait times at the kitchen faucet.
Steps to size correctly:
- Estimate daily RO water demand: Most families use 2–8 liters/day per person for drinking and cooking, but heavy coffee drinkers or people who fill water jugs may use more. Multiply by household size and add margin.
- Choose system capacity: RO systems have permeate production in gallons/day (GPD) at standard test conditions (typically 77°F and 60 psi). For example, a 50 GPD membrane under test conditions will produce about 50 gallons/day under ideal conditions. Real-world production can be lower if feed pressure or temperature is reduced.
- Consider standby tank volume: Standard under-sink tanks are 2–4 gallons (usable 1.5–2.5 depending on headspace). If you want immediate flow for filling jugs, a larger tank or a tankless system helps.
- Check feed pressure and temperature: If your house has low pressure (<40–50 psi), consider a booster pump or choose a membrane engineered for low-pressure operation. Cold water lowers production; very cold water (near 50°F) reduces permeate output — adjust sizing accordingly.
- Allow for recovery and reject: higher recovery is nicer, but lower recovery units are simpler and cheaper. Decide tolerance for waste water.
Example: a household of four people drinking 3 liters/day each = 12 liters/day (≈3.2 gallons/day). A standard 50 GPD system is more than enough; the tank provides on-demand supply so peak draws are covered. If you also use RO water for cooking, jugs, and a large coffee program, consider 75–100 GPD or tankless system.
Where to locate an ro system in kitchen
Under-sink is the most common and discreet location, but pay attention to these practicalities:
- Space: measure cabinet interior — many RO housings and tanks fit under a standard sink but check dimensions for older cabinets or corner sinks.
- Drain accessibility: RO needs a drain saddle or a proper drain connection. Position so drain line can drop without kinking.
- Faucet location: dedicated RO faucet mount on sink or countertop; ensure you have space for drilling or use existing accessory holes.
- Shutoff & bypass: include an inlet shutoff valve and a feed adapter for ease of service.
- Ventilation and temperature: avoid extremely hot cabinets or below-freezing spaces (RO membranes and tanks are damaged by freezing).
- Alternative placements: small apartments may use countertop RO units or place the tank in a nearby cabinet with long tubing.
Installation options: DIY vs professional
Installing an ro system in kitchen can be a DIY job for those comfortable with basic plumbing, but many homeowners prefer professional installation for convenience, warranty, or complexity reasons.
DIY pros:
- Lower cost — you save installation fees.
- Control — you can position and test the system yourself.
DIY cons:
- Mistakes can cause leaks and damage as under-sink areas are often adjacent to cabinets and floors.
- Some warranties require professional installation for full coverage.
- Handling the drain connection and ensuring sanitary assembly may be uncomfortable.
Professional pros:
- Fast, code-compliant install with proper drain, faucet mounting, and pressure checks.
- Plumbers can add booster pumps, pressure switches, or dedicated pre-treatment if needed.
- Many installers will register the system and provide a service schedule.
Professional cons:
- Added cost — typical plumbing install for an RO system ranges widely but often $100–$300 depending on complexity and region.
Maintenance and service schedule for a kitchen RO system
Regular maintenance keeps performance high and water safe.
Typical schedule:
- Sediment & carbon prefilters: replace every 6–12 months (frequency depends on feedwater quality). These protect the RO membrane and are inexpensive.
- RO membrane: replace every 2–5 years depending on feedwater quality, usage, and prefilter maintenance. Lower-quality or neglected prefilters shorten membrane life.
- Post-carbon & remineralizer: replace annually or every 12 months (post-carbon typically follows similar lifecycle to prefilters).
- Sanitize system: sanitize and flush the system annually during major service or when changing the membrane to avoid biofilm.
- Tank check: if you notice odors, taste changes, or reduced delivery, sanitize or replace tank bladder assembly as needed.
- Leak & line inspection: check tubing and fittings during each change for wear.
Pro tip: keep a simple maintenance log under the sink with install dates and next-change reminders — it prevents forgotten replacements and lost warranties.
Water waste, recovery and conservation tips
RO systems generate reject water. Here are practical ways to reduce or reuse waste:
- Install a high-recovery RO if you want less waste; these systems use staged membranes or pumps to increase recovery.
- Use reject water for non-potable tasks — connect drain water to a bucket for plant watering, mopping, or toilet flushing (where sanitary rules allow). Note: reject contains higher TDS and possibly concentrated contaminants — for gardening, consider if salts are acceptable.
- Add a permeate pump — increases recovery and reduces reject by using energy on permeate side (non-electric permeate pumps exist).
- Ensure proper sizing and pressure — low pressure reduces efficiency; a booster pump can improve recovery and throughput.
- Consider tankless RO — reduces tank losses and can be more water-efficient in some designs.
Costs and budget expectations
Initial and running costs depend on system type.
Typical ranges:
- Entry-level under-sink RO (50 GPD): $150–$400 for unit; $100–$300 installed.
- Mid-range with remineralizer or better membranes: $300–$800 unit; $200–$500 installed.
- Tankless or high-recovery systems: $600–$1,500+ depending on pump and features.
- Annual consumables & service: $50–$200 (filters) + membrane replacement (~$50–$200 spread over 2–5 years).
- Electricity for booster pumps: minimal but present for systems with pumps.
When budgeting, include cartridges, possible annual sanitization, and if you plan to reuse reject water, set up plumbing or containers.
Troubleshooting common ro system in kitchen problems
- Low flow at RO faucet: check tank pressure (bladder tanks require ~7–8 psi empty), clogged prefilter, fouled membrane, or closed feed valve.
- Bad taste or odor: likely exhausted post-carbon or biofilm — sanitize system and change post-carbon.
- High TDS on permeate: check for membrane failure; test TDS before and after RO and replace membrane if rejection drops.
- Leaking fittings: ensure tubing fully inserted into push-fit connectors and that ferrules/compression fittings are tight but not over-torqued. Replace damaged tubing.
- Noisy pump (if present): may be air in line or cavitation; consult manual and installer.
Testing and validation
To verify performance:
- Measure TDS with a handheld TDS meter before and after the RO. Expect large percentage drops (e.g., 90%+) though exact values depend on membrane and feed TDS.
- Annual lab tests for suspected contaminants (lead, PFAS) provide definitive assurance, especially where health concerns existed.
- Taste & clarity checks — not scientific but helpful day-to-day; sudden change suggests a problem.
Extra features and useful upgrades
- Smart monitors: TDS monitors or flow meters with alerts simplify maintenance and catch membrane failures early.
- Remineralizer cartridge: raises pH and adds minerals for taste.
- Inline UV: for well water or microbial risk, add a UV stage after RO to provide extra protection.
- Quick-change housings: reduce service time and make change-outs simpler.
Comparing products — what to look for on spec sheets
When comparing units or shopping pages (for example, see https://yourwatergood.com/product/ro-water-purifier/ for a product baseline), focus on:
- Membrane GPD rating and expected real-world performance (note feed pressure and temp assumptions).
- Stage list (sediment micron rating, carbon type, remineralizer).
- Certifications (NSF/ANSI 58 for RO; NSF 42 for carbon stages).
- Tank size and usable volume.
- Recovery ratio and waste rate.
- Fitting types and faucet finish.
- Warranty and local support options.
Conclusion — making the ro system in kitchen deliver lasting value
An ro system in kitchen is an excellent investment when your priorities include low-TDS drinking water, better ice and beverage quality, or removal of dissolved contaminants that carbon filters can’t handle. The right choice depends on a simple set of facts: your water test results, daily water demand, available space and feed pressure, and whether you want remineralized water.
Practical next steps:
- Get a basic water test (TDS, hardness, chlorine, lead, any local concerns like PFAS).
- Decide target outcomes: pure drinking water, better ice, health-specific removal, or all of the above.
- Choose a system type: standard under-sink RO for most families, remineralizer if you prefer taste, high-recovery or pump if feed pressure or waste is a concern.
- Compare certified product specs and check maintenance routines. Use product pages like https://yourwatergood.com/product/ro-water-purifier/ to compare membranes, stages and consumables.
- Install professionally if you lack plumbing confidence, and set a service calendar.